- Secure order
- Easy return shipment
- Service-Hotline +41 71 511 23 70
Instructions No. 3585
Difficulty: Advanced
Working time: 5 Hours

Step 1: Cut out the template
Start your creative project by downloading and printing our free template. The template will help you to create the perfect lily pad shape. Cut it out carefully so that you can continue working without any problems.
Step 2: Preparing the workspace
To avoid chaos and so that you can concentrate fully on your work, start by protecting your workspace with a wipe-clean surface. This will keep everything clean and tidy.
Step 3: Prepare the soft clay
Take a piece of soft clay and work it with your hands until it is soft and pliable enough to roll out. Roll out the soft clay evenly with a modeling roller to a thickness of about 10 mm.
Step 4: Shape the lily pad
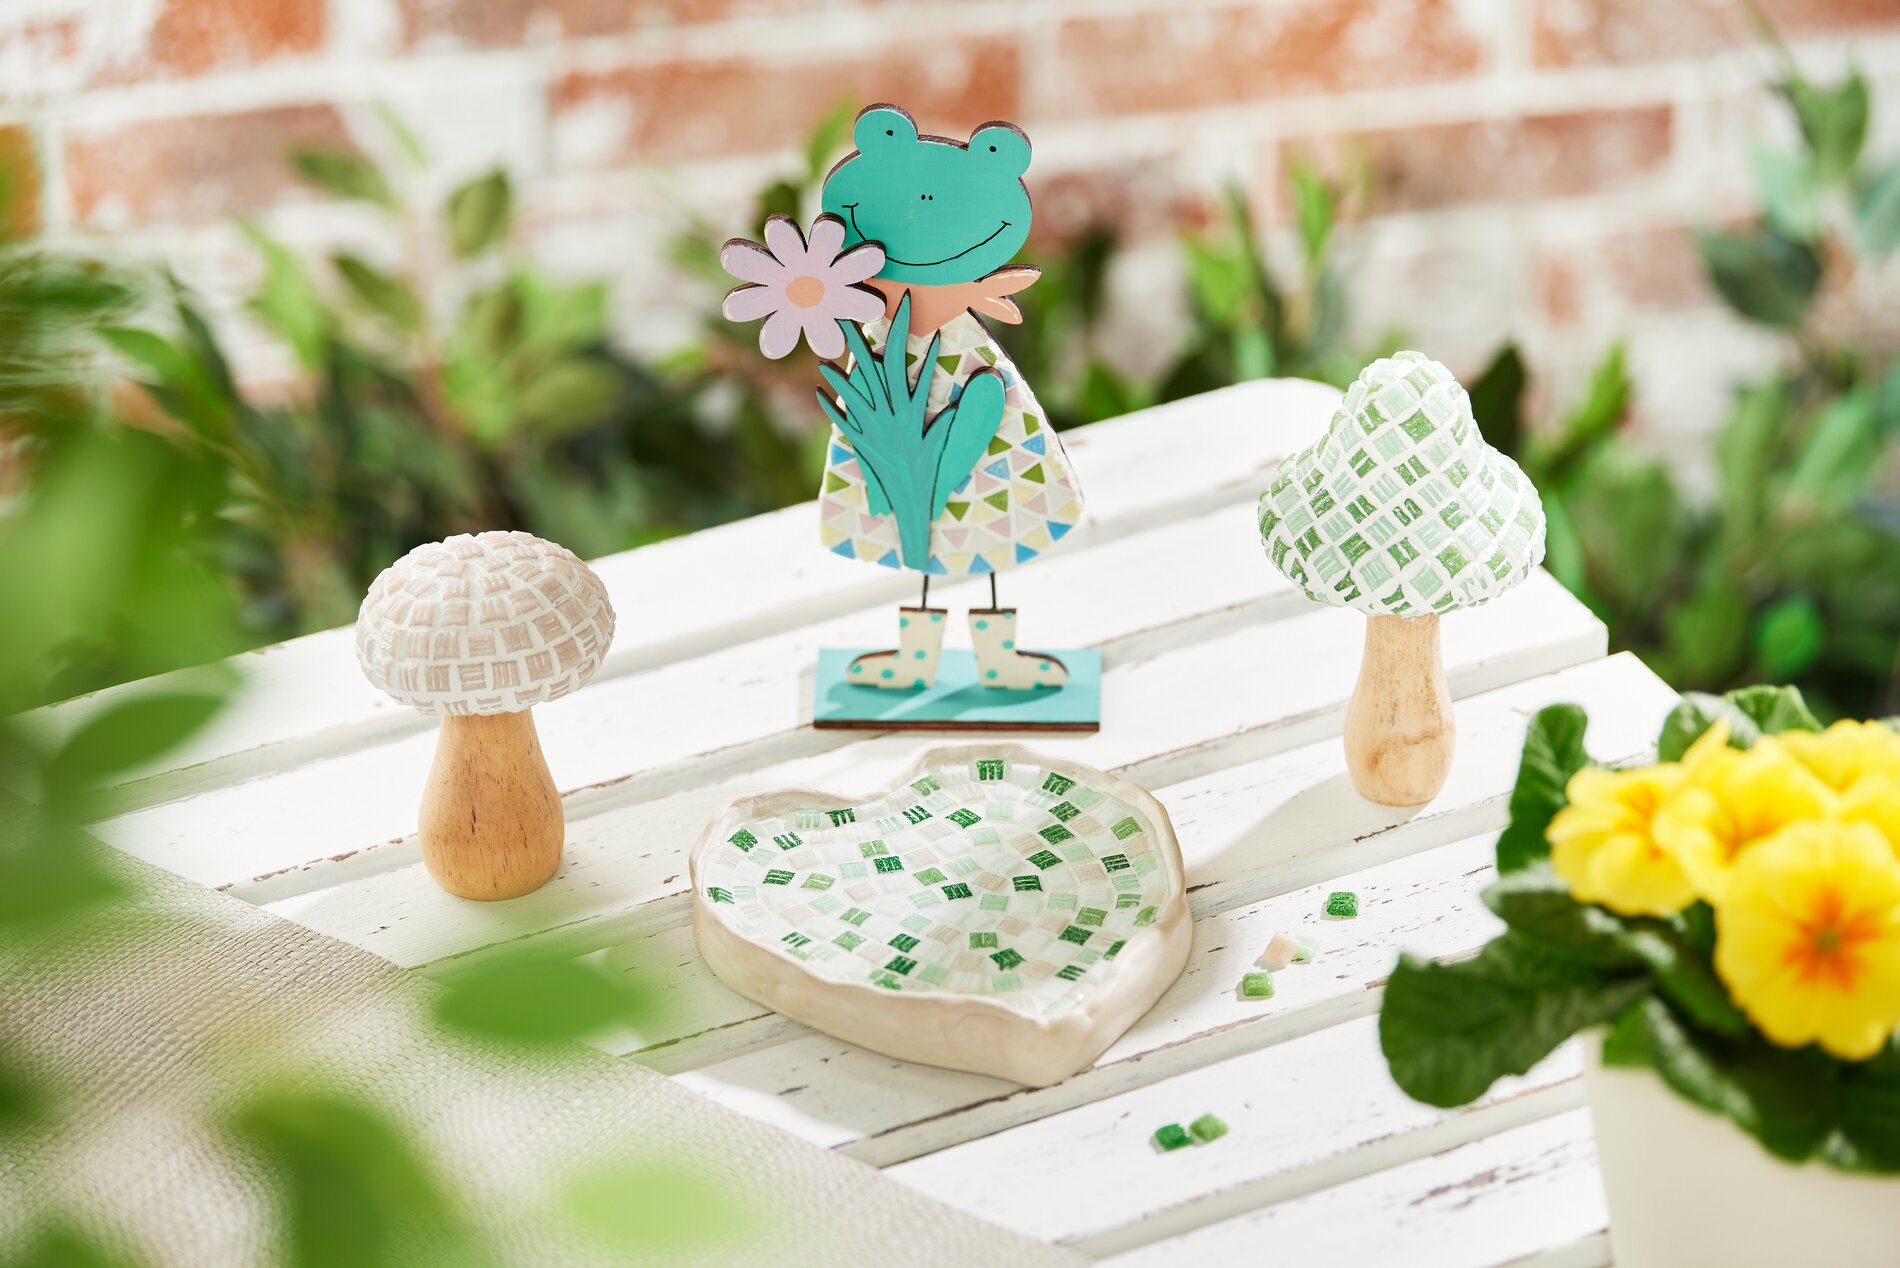
Place the prepared template on the rolled-out soft clay and cut the clay to size using the template. Remove the excess soft clay so that only the desired leaf shape remains.
Step 5: modelling and drying
Gently bend the edges of the lily pad upwards to achieve the typical shape and leave it to dry thoroughly for around 24 hours.
Step 6: Seal with clay sealant
Once the sheet is completely dry, coat it all over with clay sealant. This layer ensures that all pores are closed and makes your work more durable.
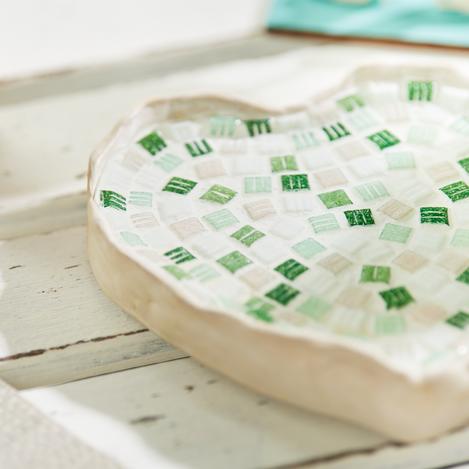
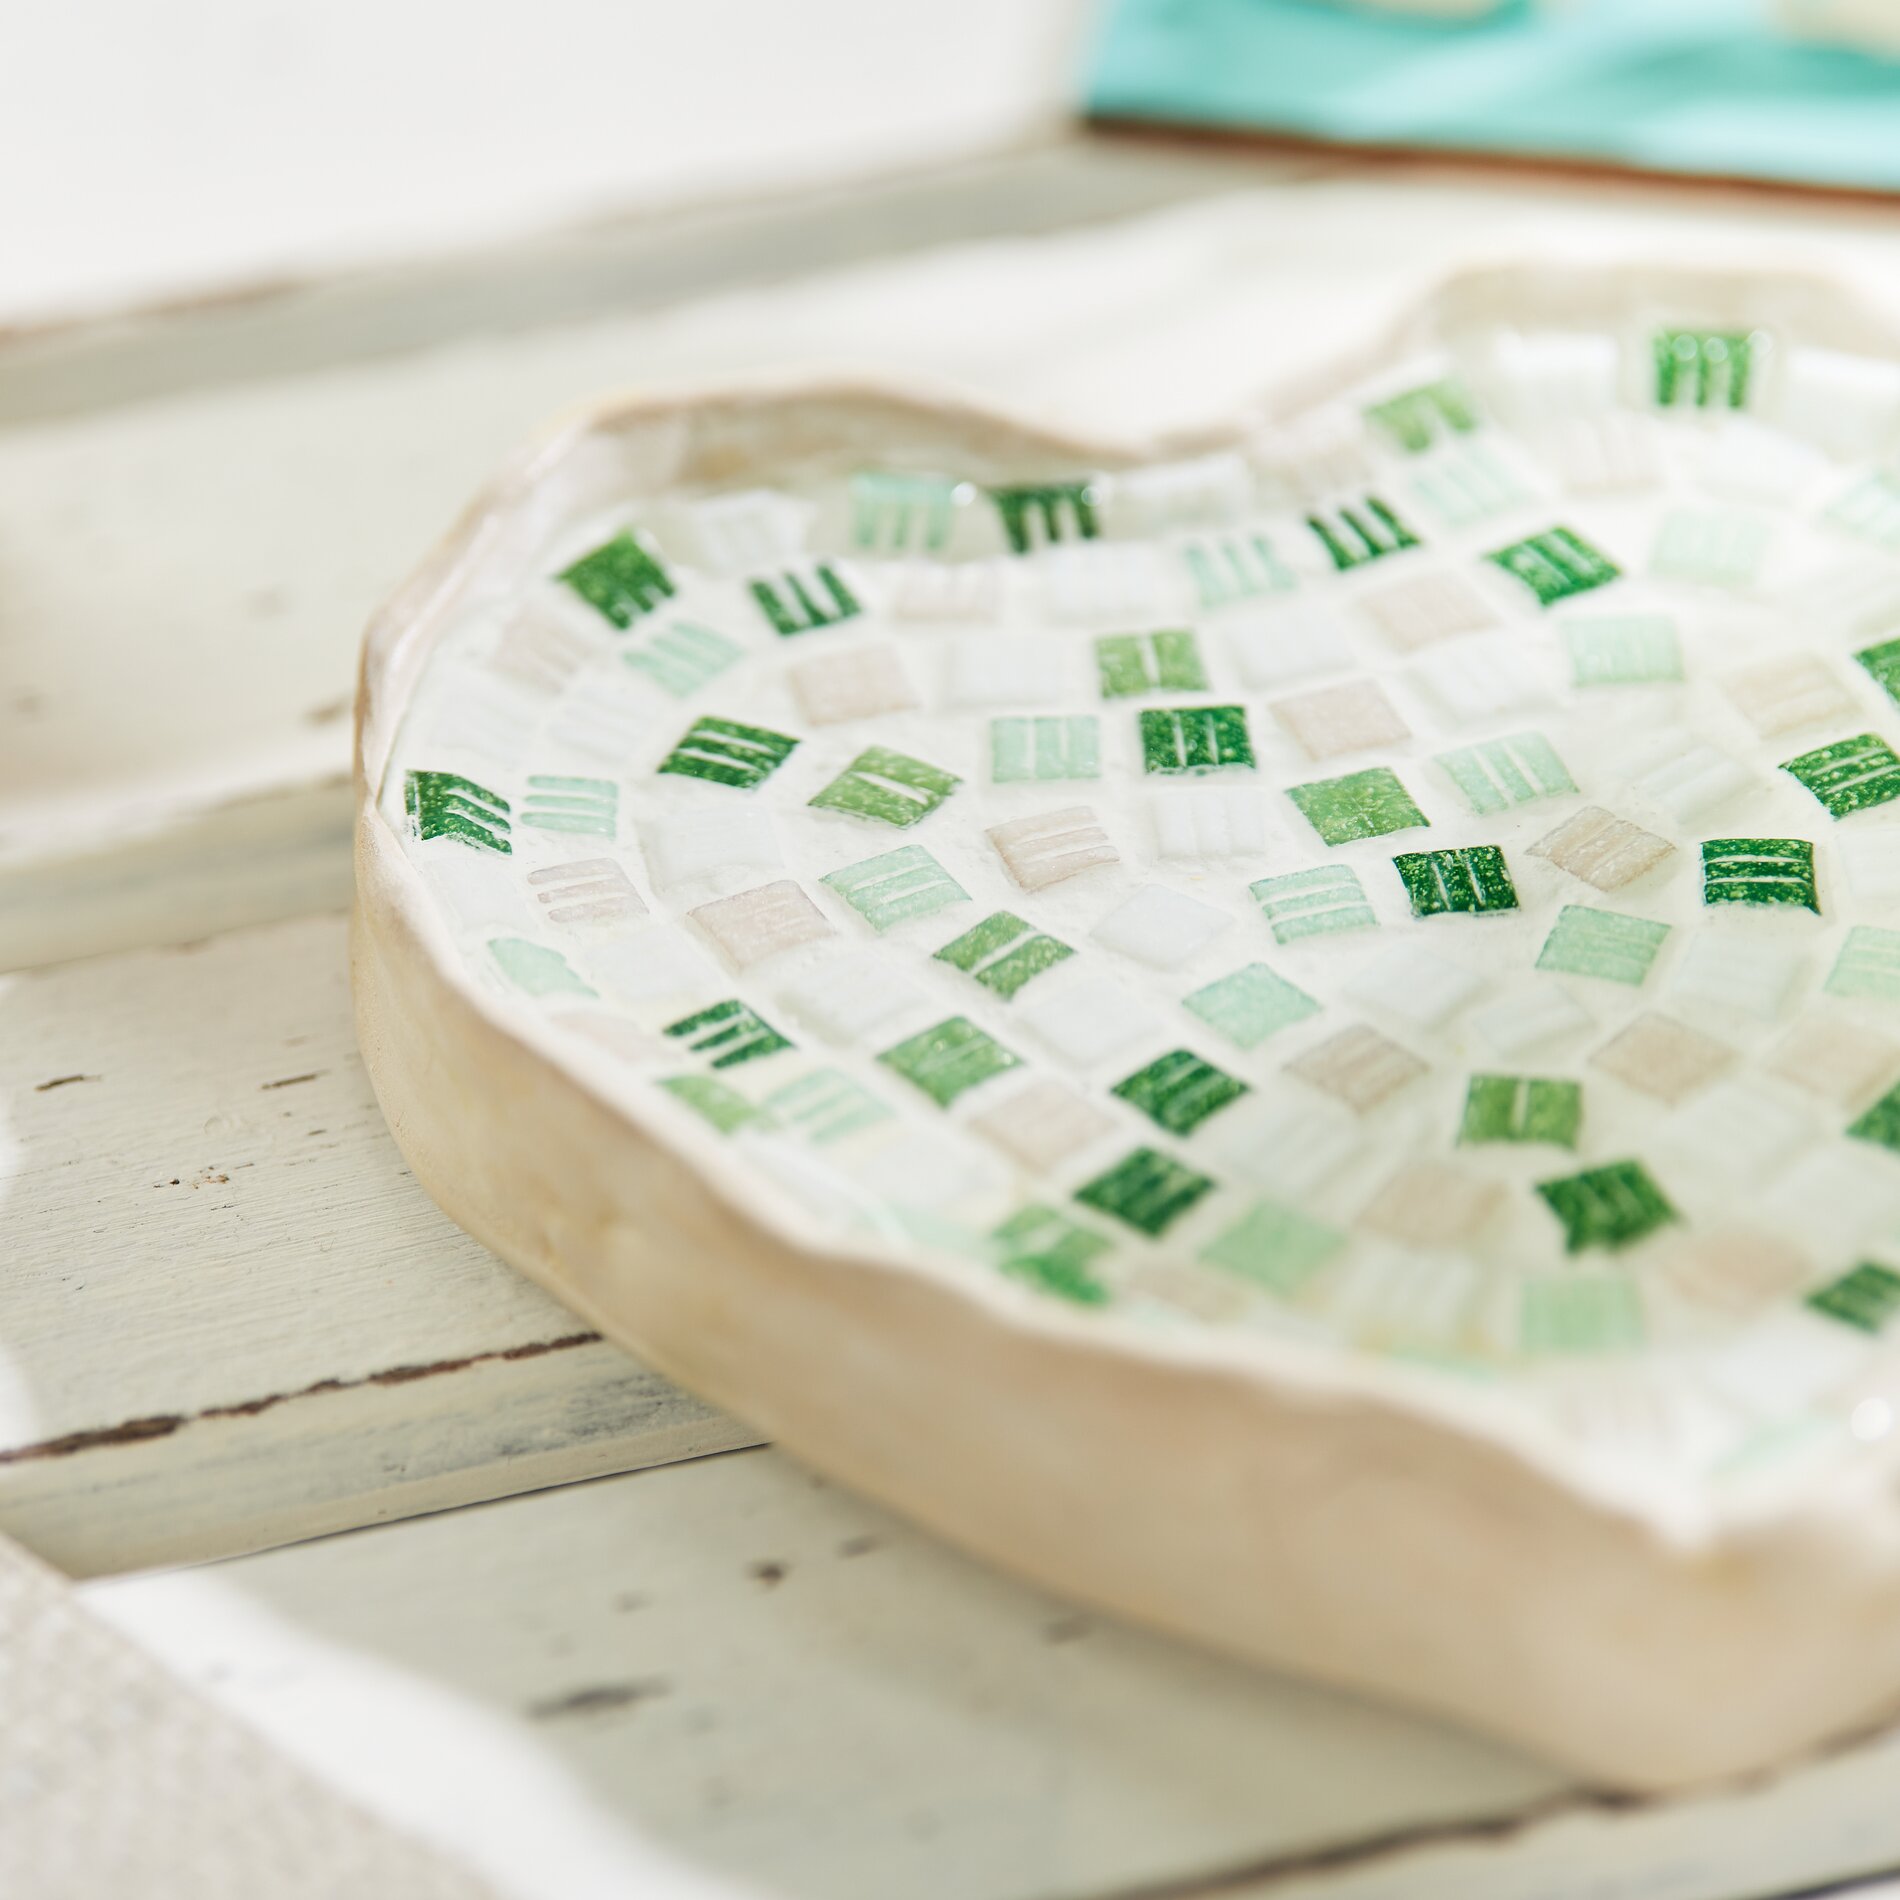
Step 7: Decoration with mosaic stones
Now the creative part begins! Apply a thin layer of mosaic adhesive to the surface and leave it to flash off for 10 minutes. Then place mosaic stones on the surface as desired. Use mosaic tongs to cut the tiles into the desired sizes. Let everything dry well.
Step 8: Apply joint filler
Mix some joint filler with water until it reaches a creamy consistency. Apply the mixture with a brush in the spaces between the mosaic stones . Carefully remove any excess joint filler with a damp cloth or sponge and allow the mosaic stones to dry.
Step 9: Protection with joint finish
Now the transparent grout finish comes into play: apply it to the mosaic to ensure that the colors of your mosaic stones remain bright and weather-resistant.
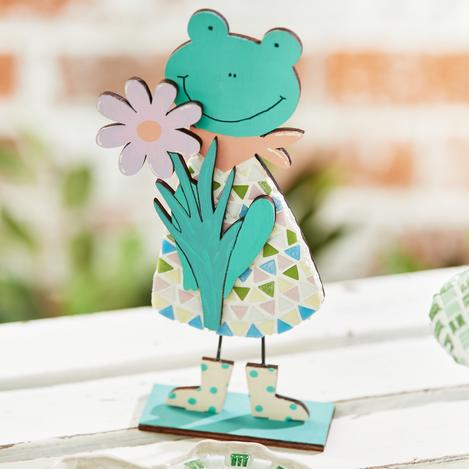
Step 10: Add creative details
Paint the frog with the craft paints and cover the body with "Triangle" glass mosaic glue. If you have painted over pre-drawn lines, you can trace them with a marker .
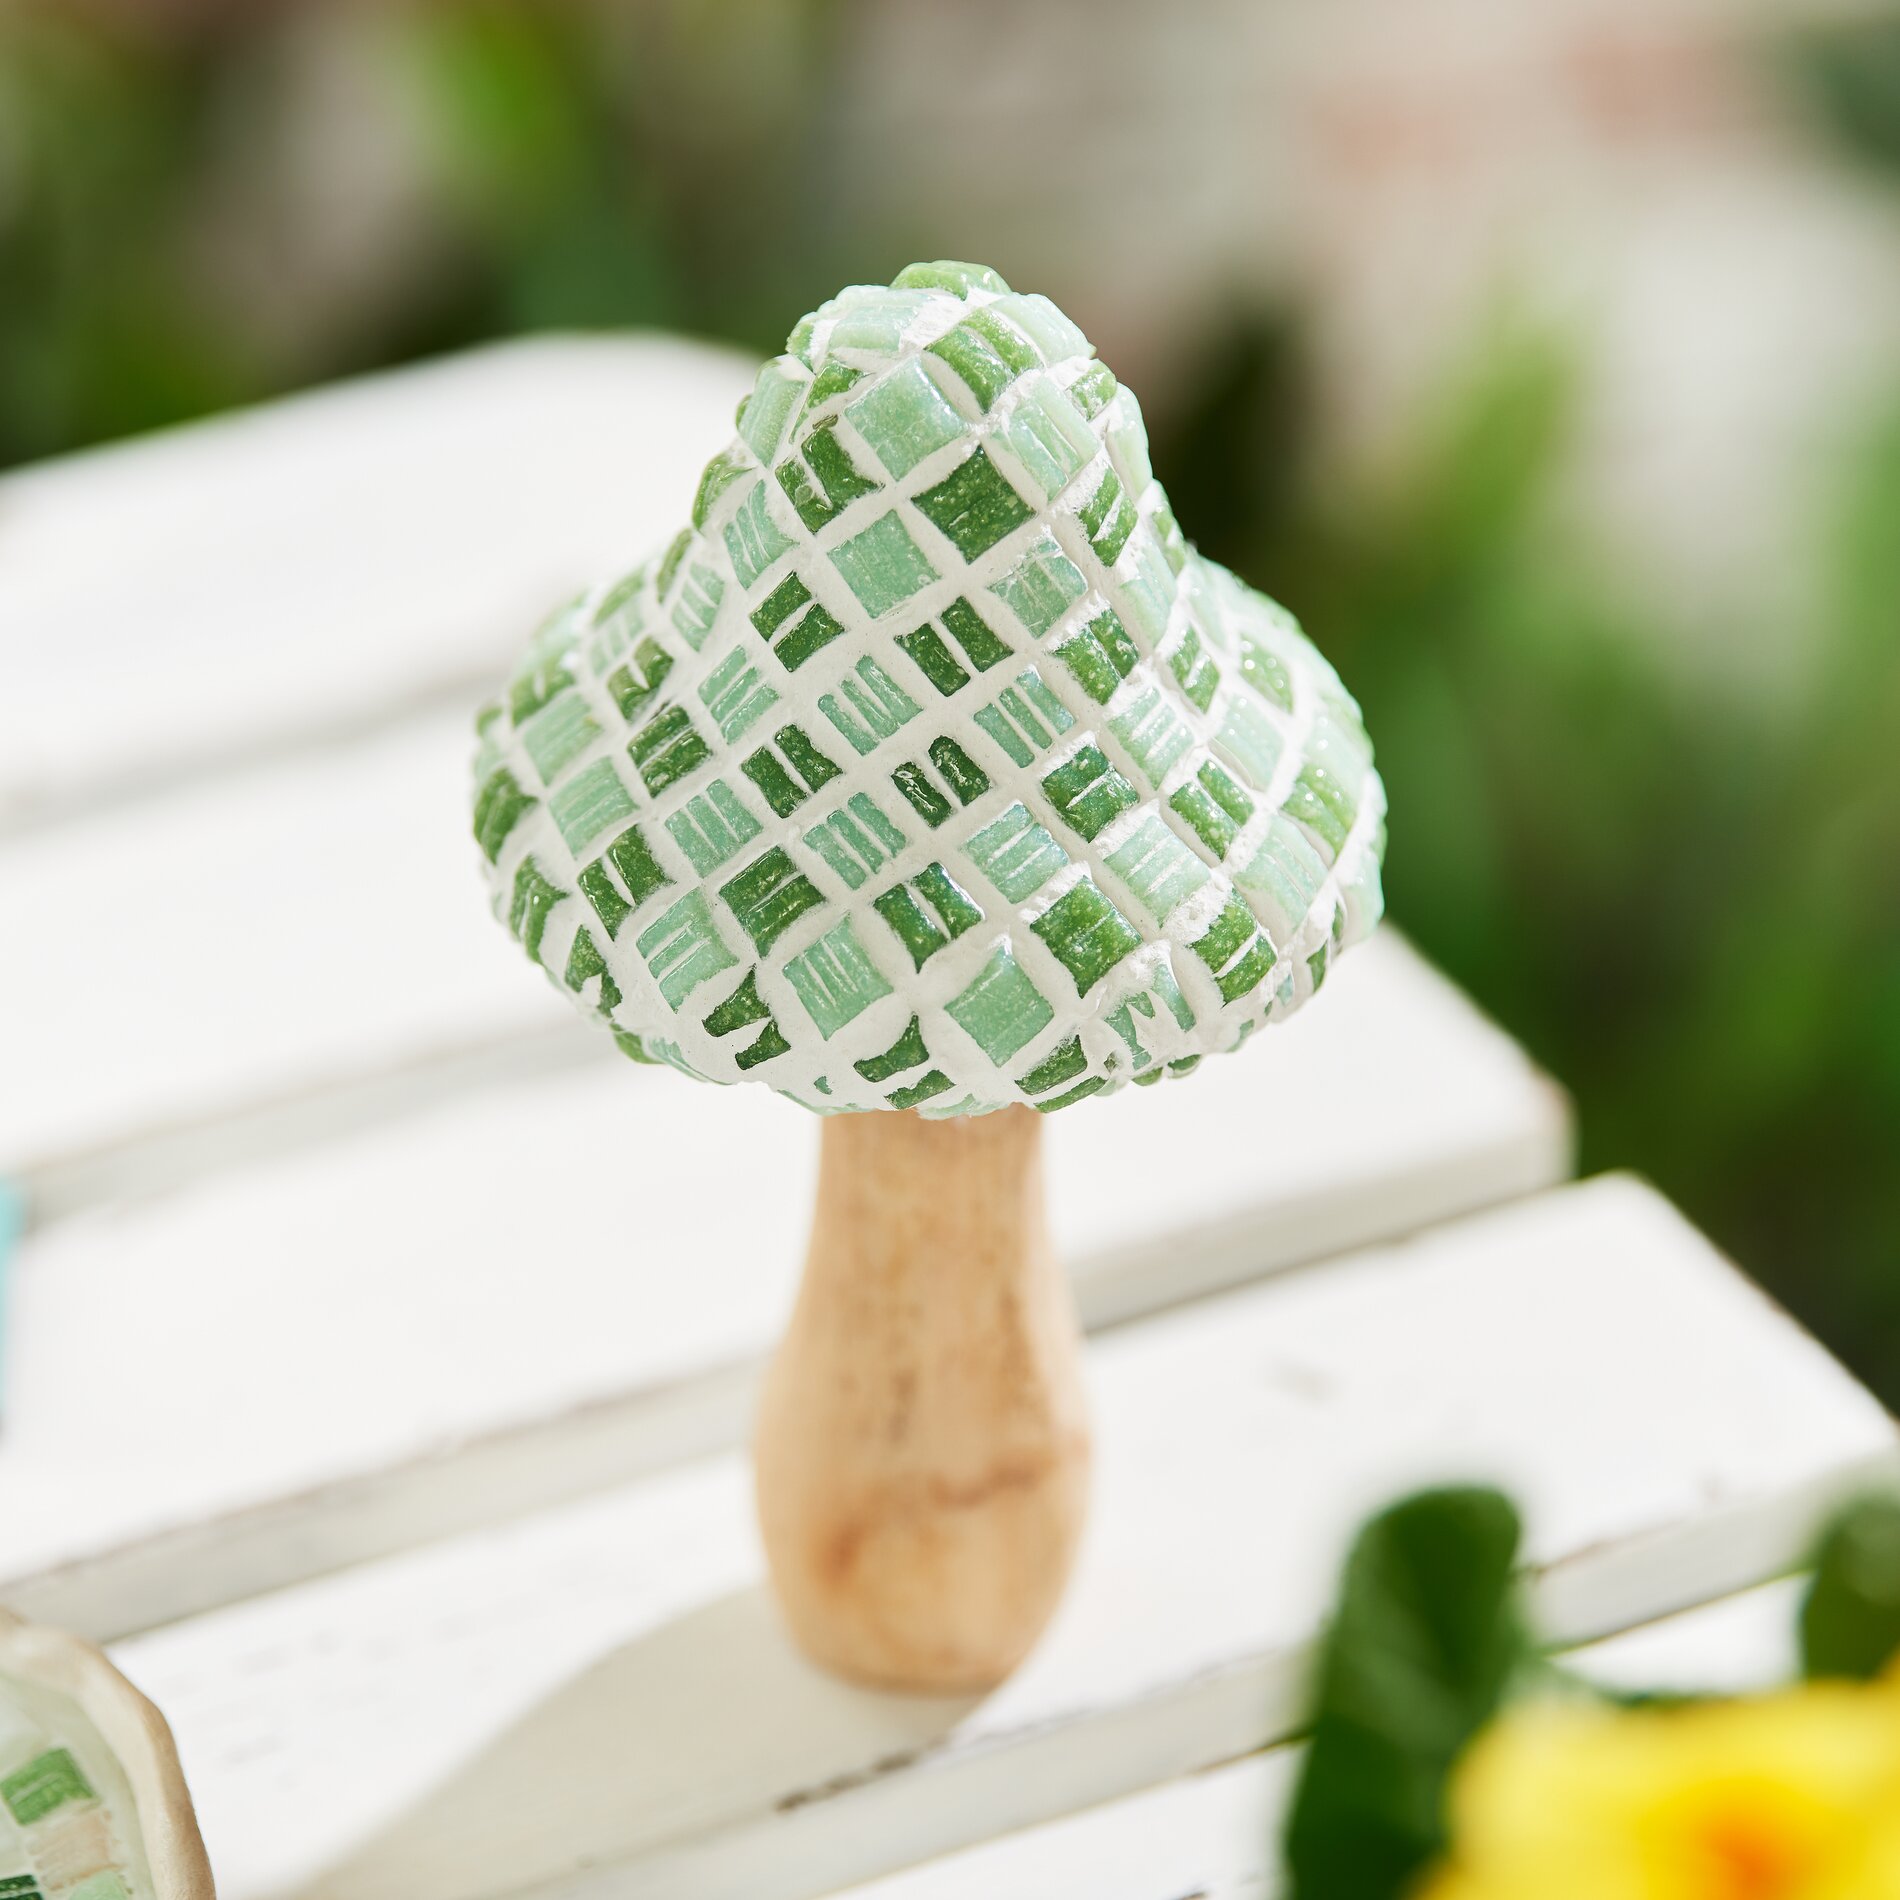
The mushrooms can also be covered with mosaic stones - make sure that the stones dry on the curves in between.
Step 11: Apply weather protection
Finally, coat the entire bird bath with weatherproofing. This step protects your work of art from the weather and increases its longevity.
Fascinated by the idea of decorating your garden with an artistic bird bath? Visit our online store to order all the materials you need quickly and easily. Let your creativity run wild and create a magical oasis in your garden!