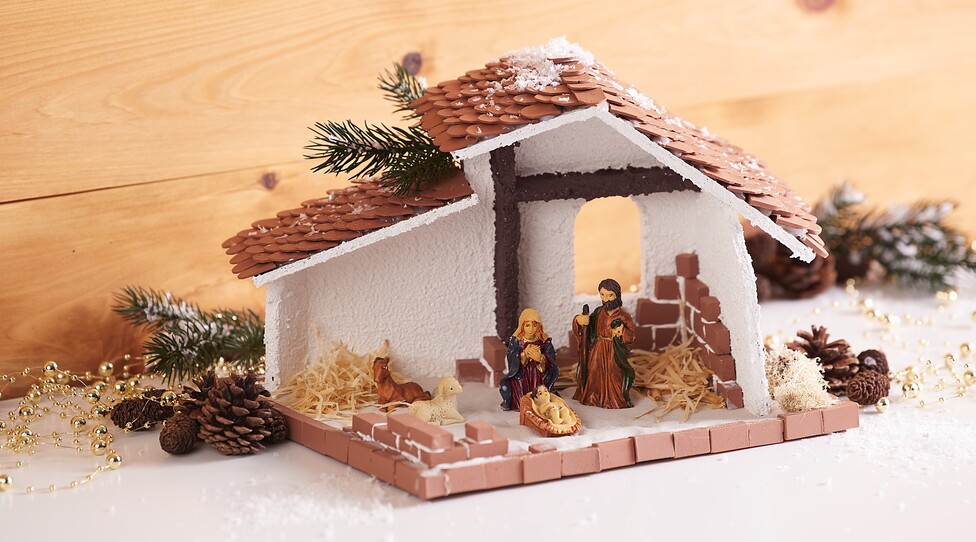
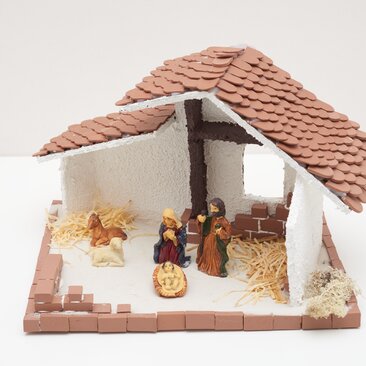
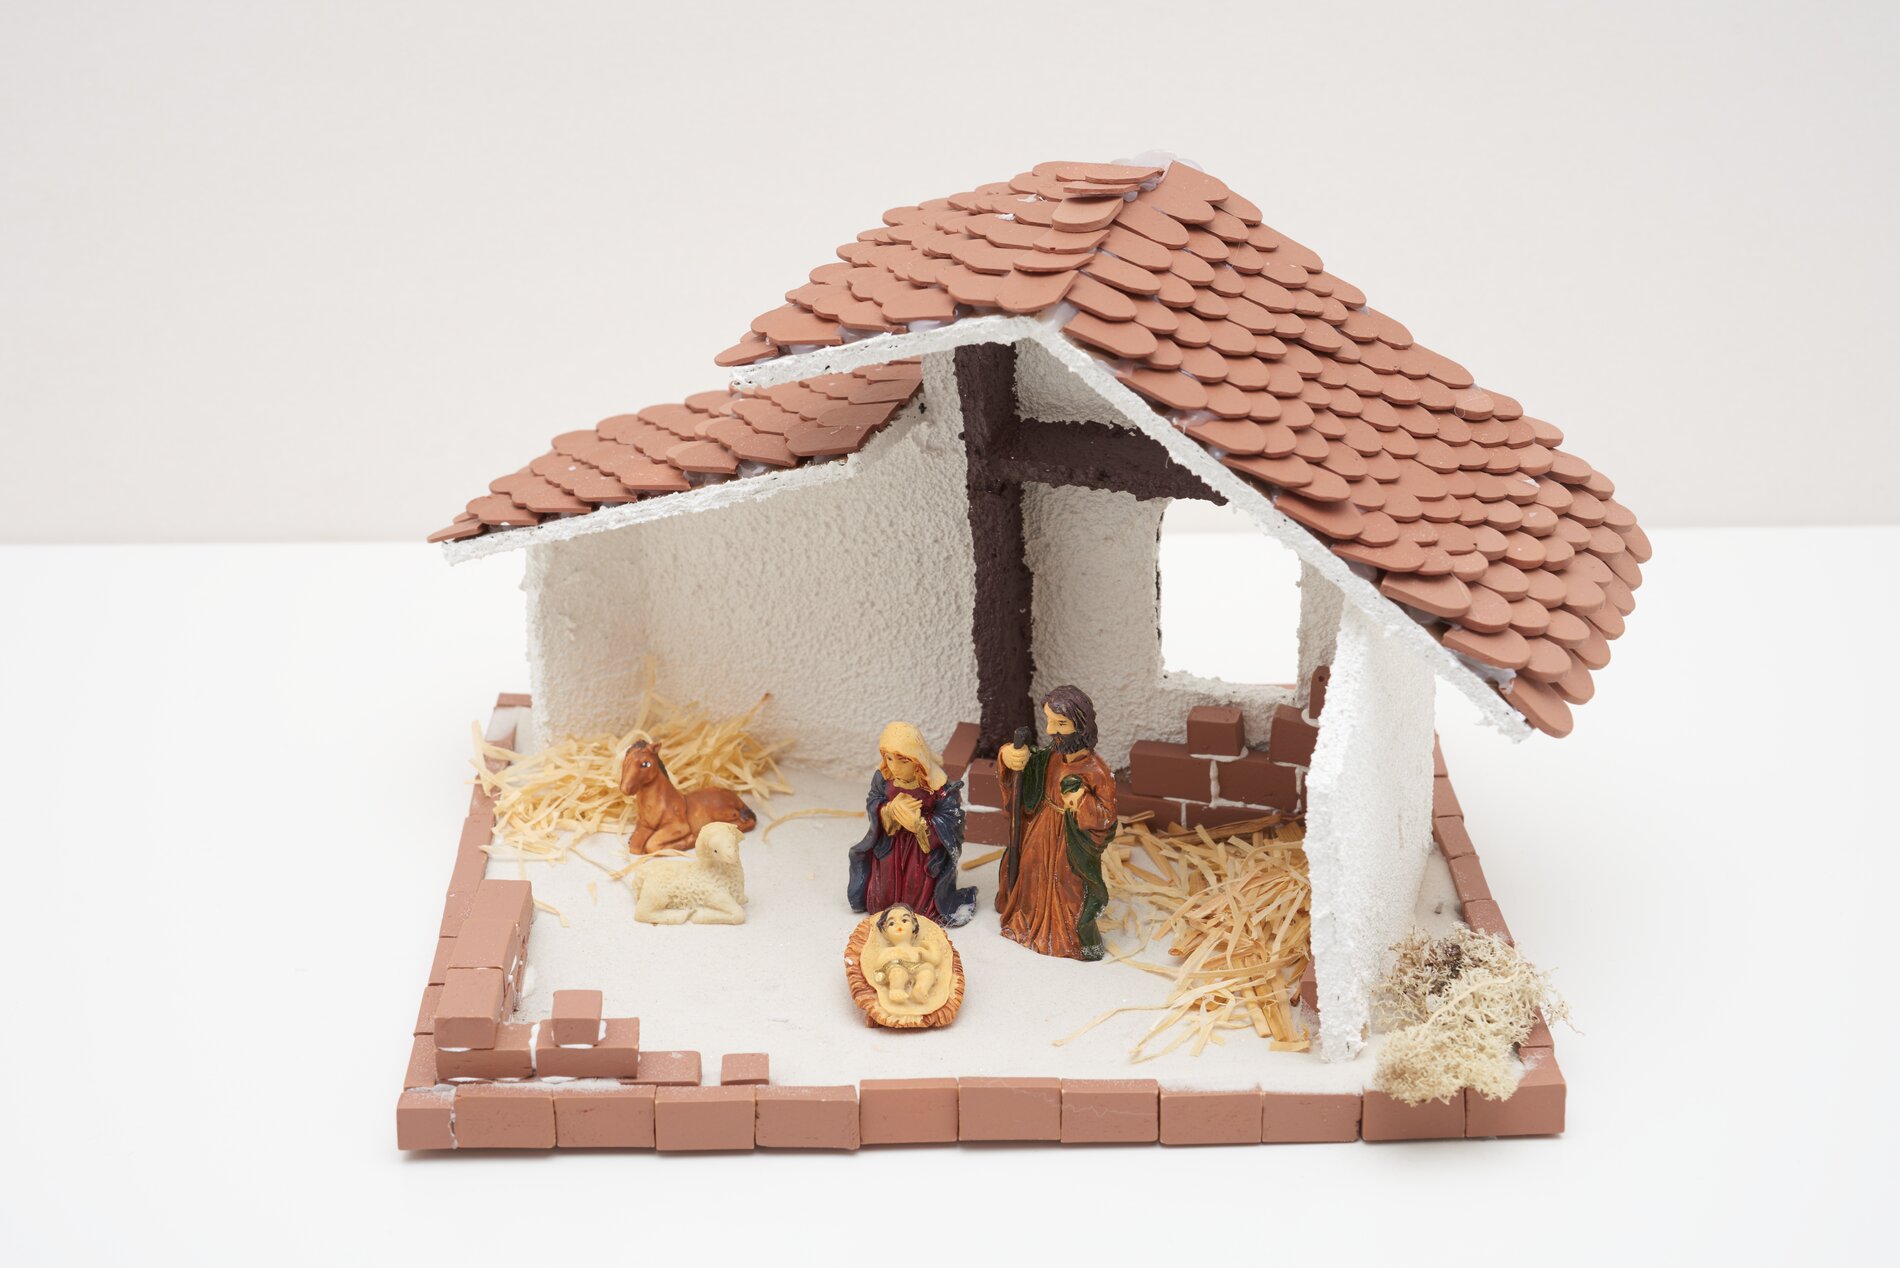
Nativity are an absolute must at Christmas time for decoration. Our nativity scene is a self-built nativity scene. Thanks to our templates it is easy to rebuild and is very inexpensive, because it is made of Corrugated board and Structure Paste exists.
It's that simple:
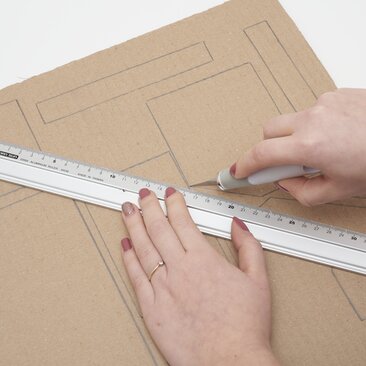
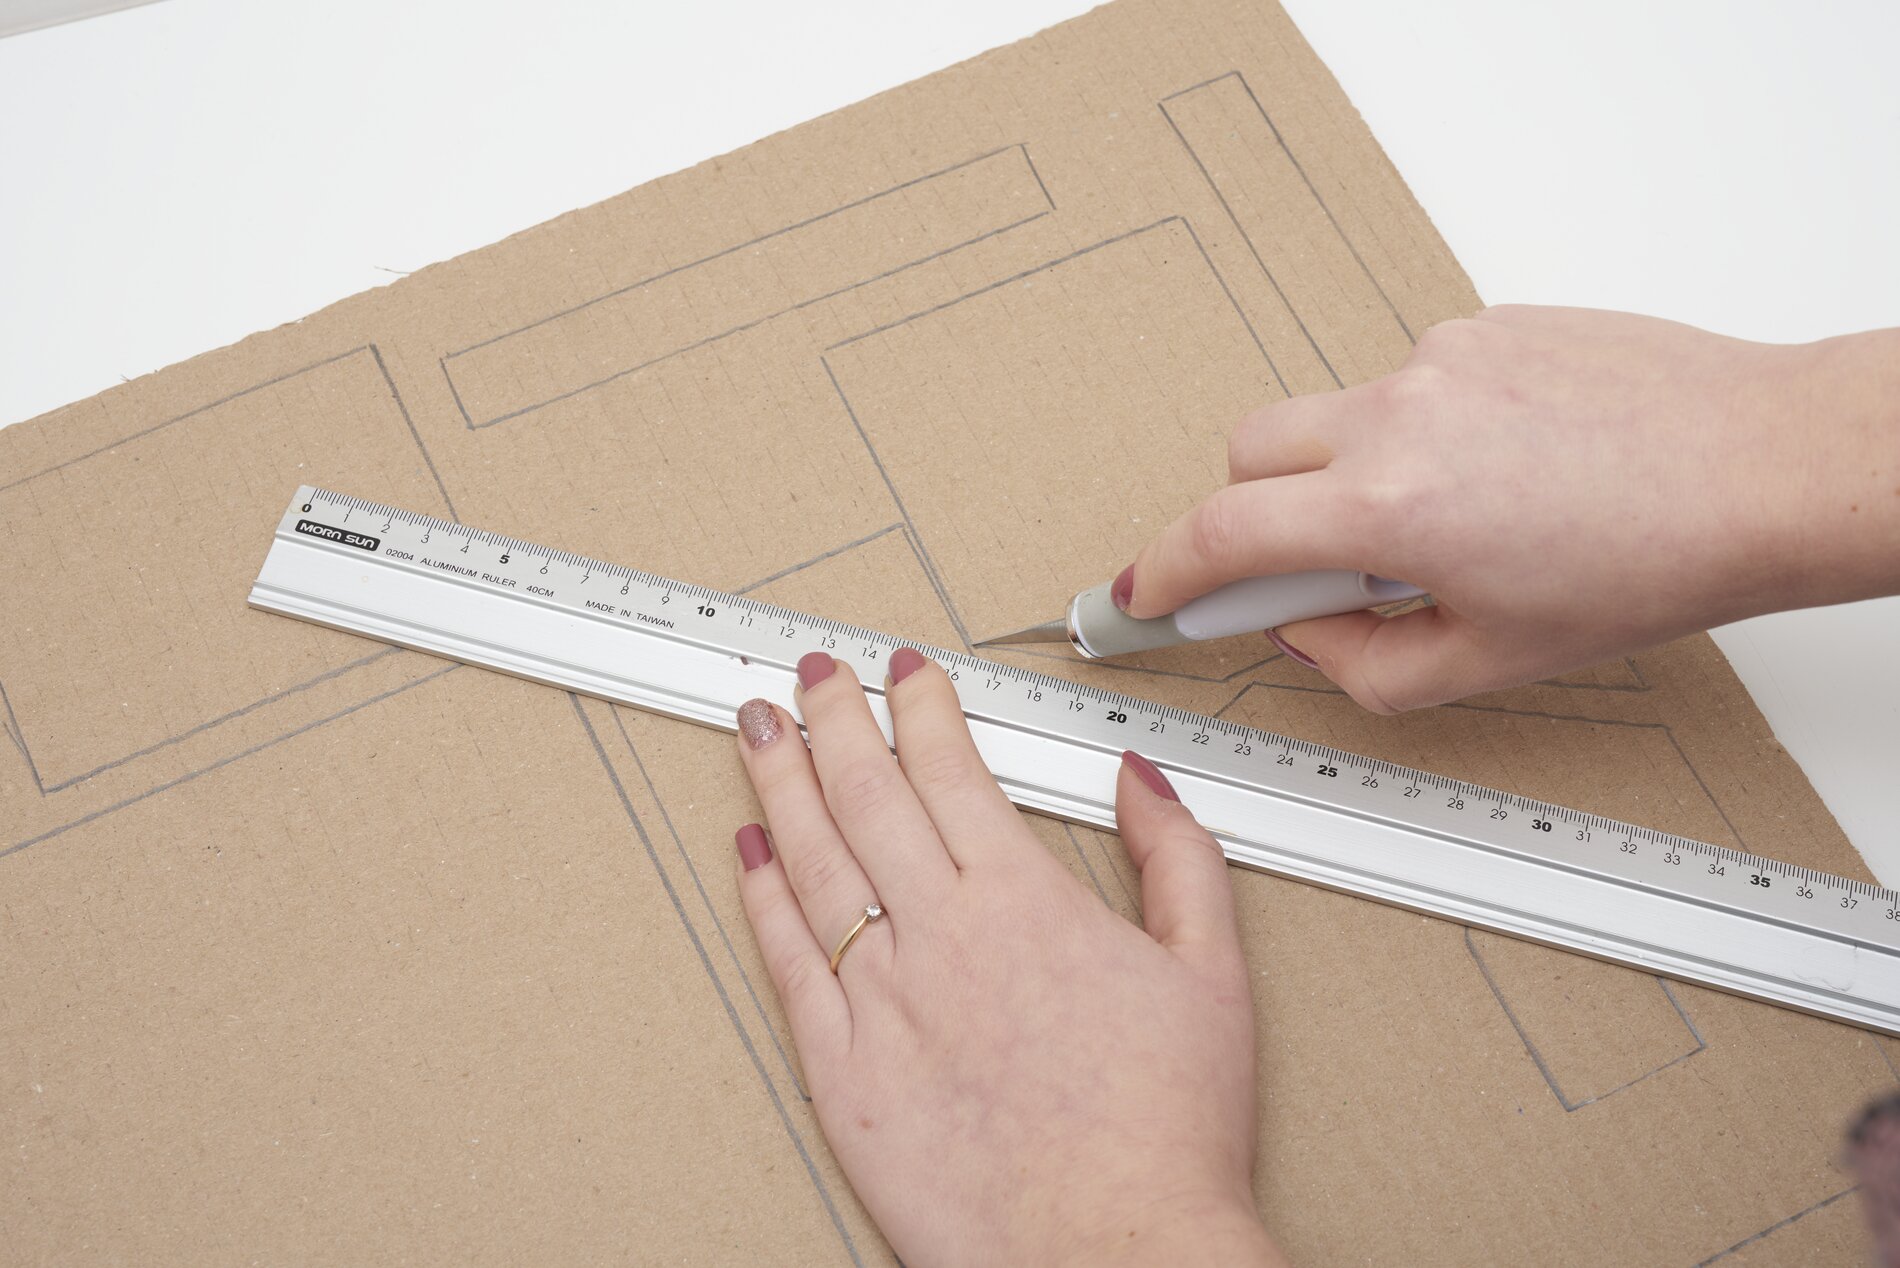
First print out the template for the nursery. Transfer the template to the Corrugated boardmark the components and cut them out afterwards. For the base plate, please cut out a rectangle measuring 22 x 25 cm.
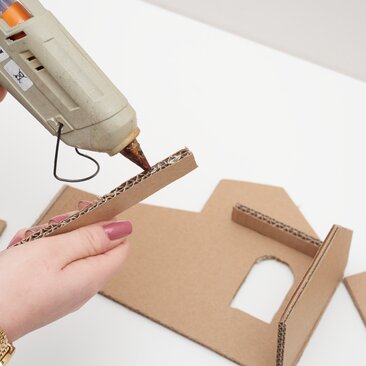
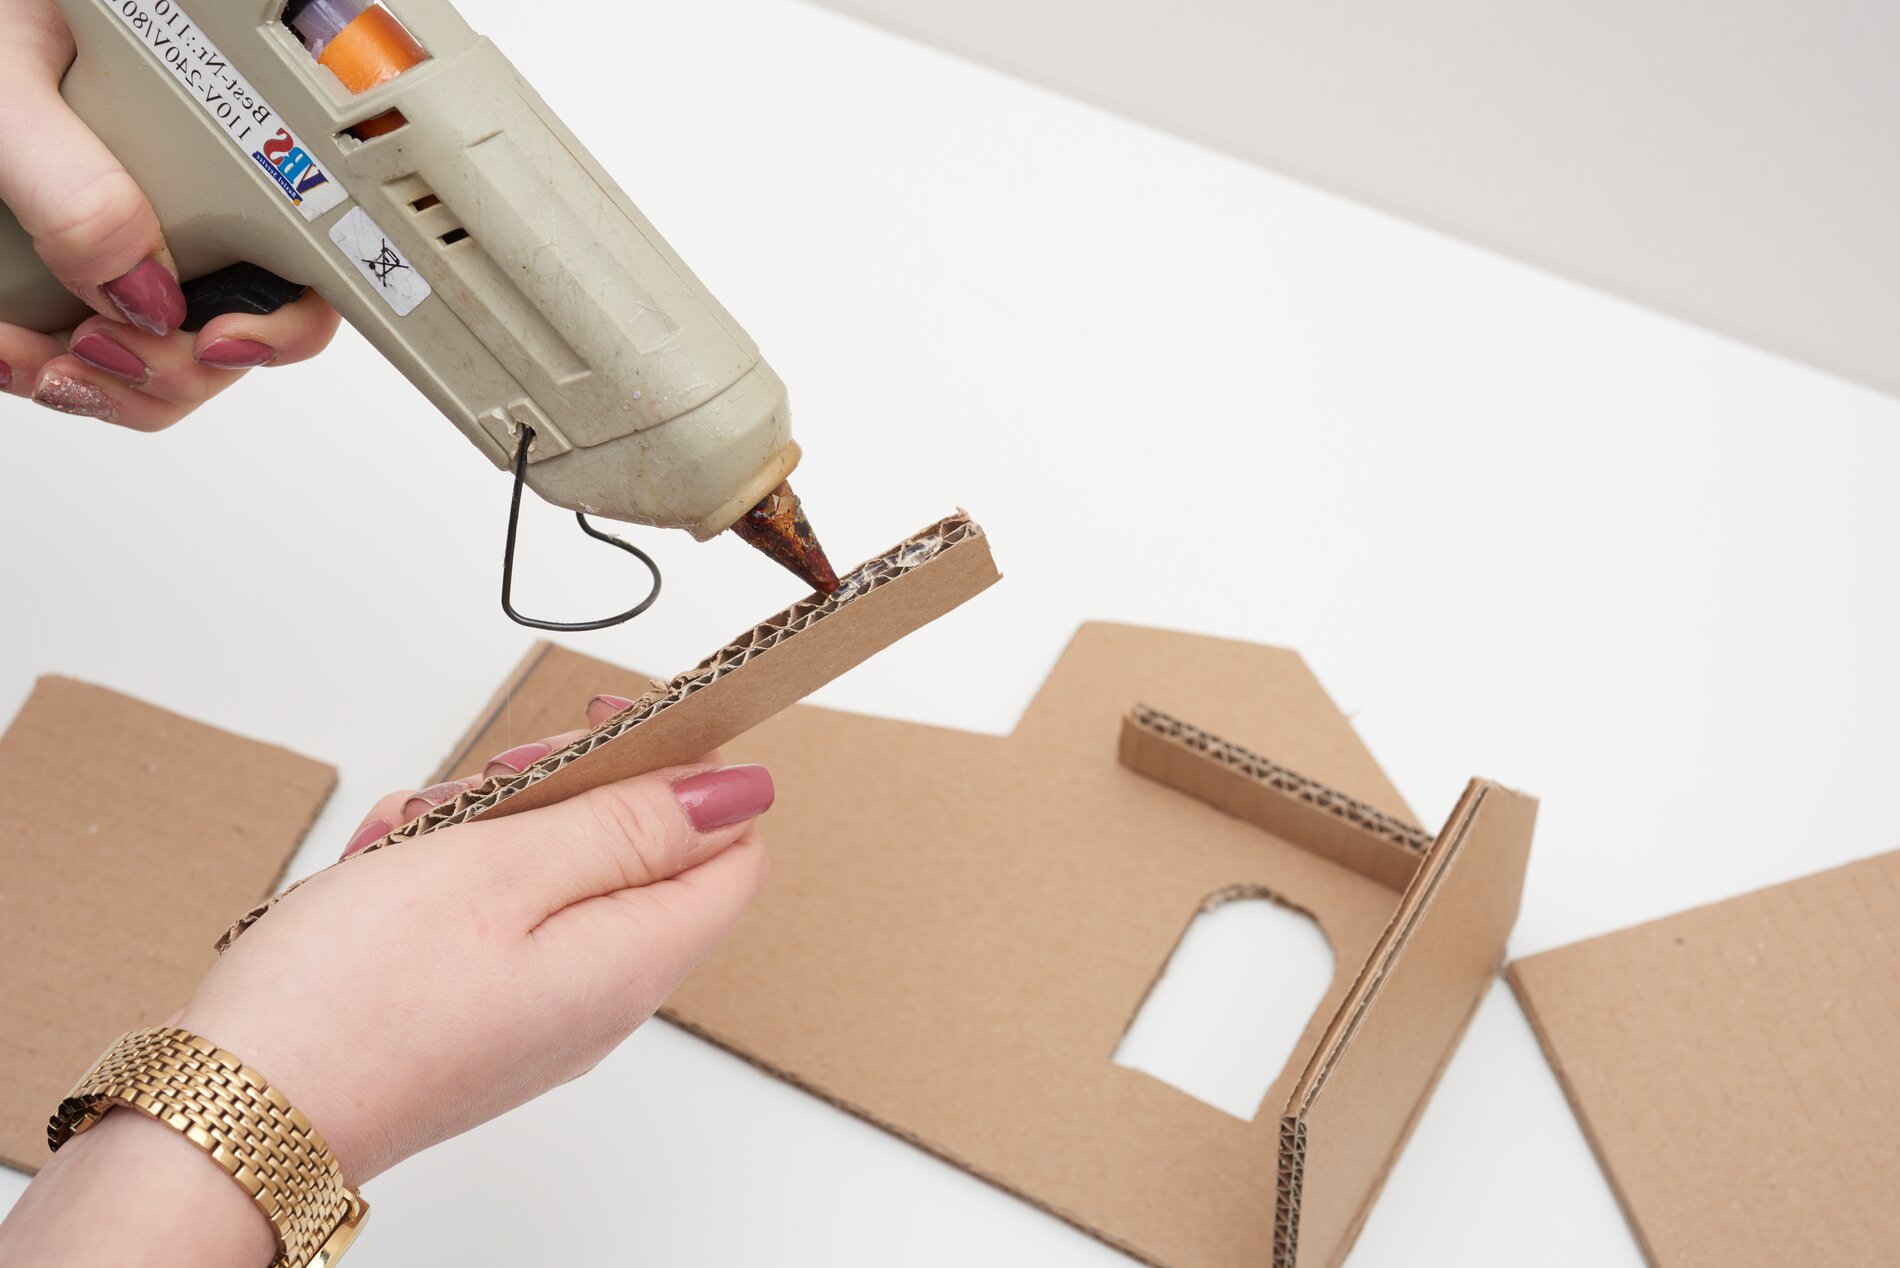
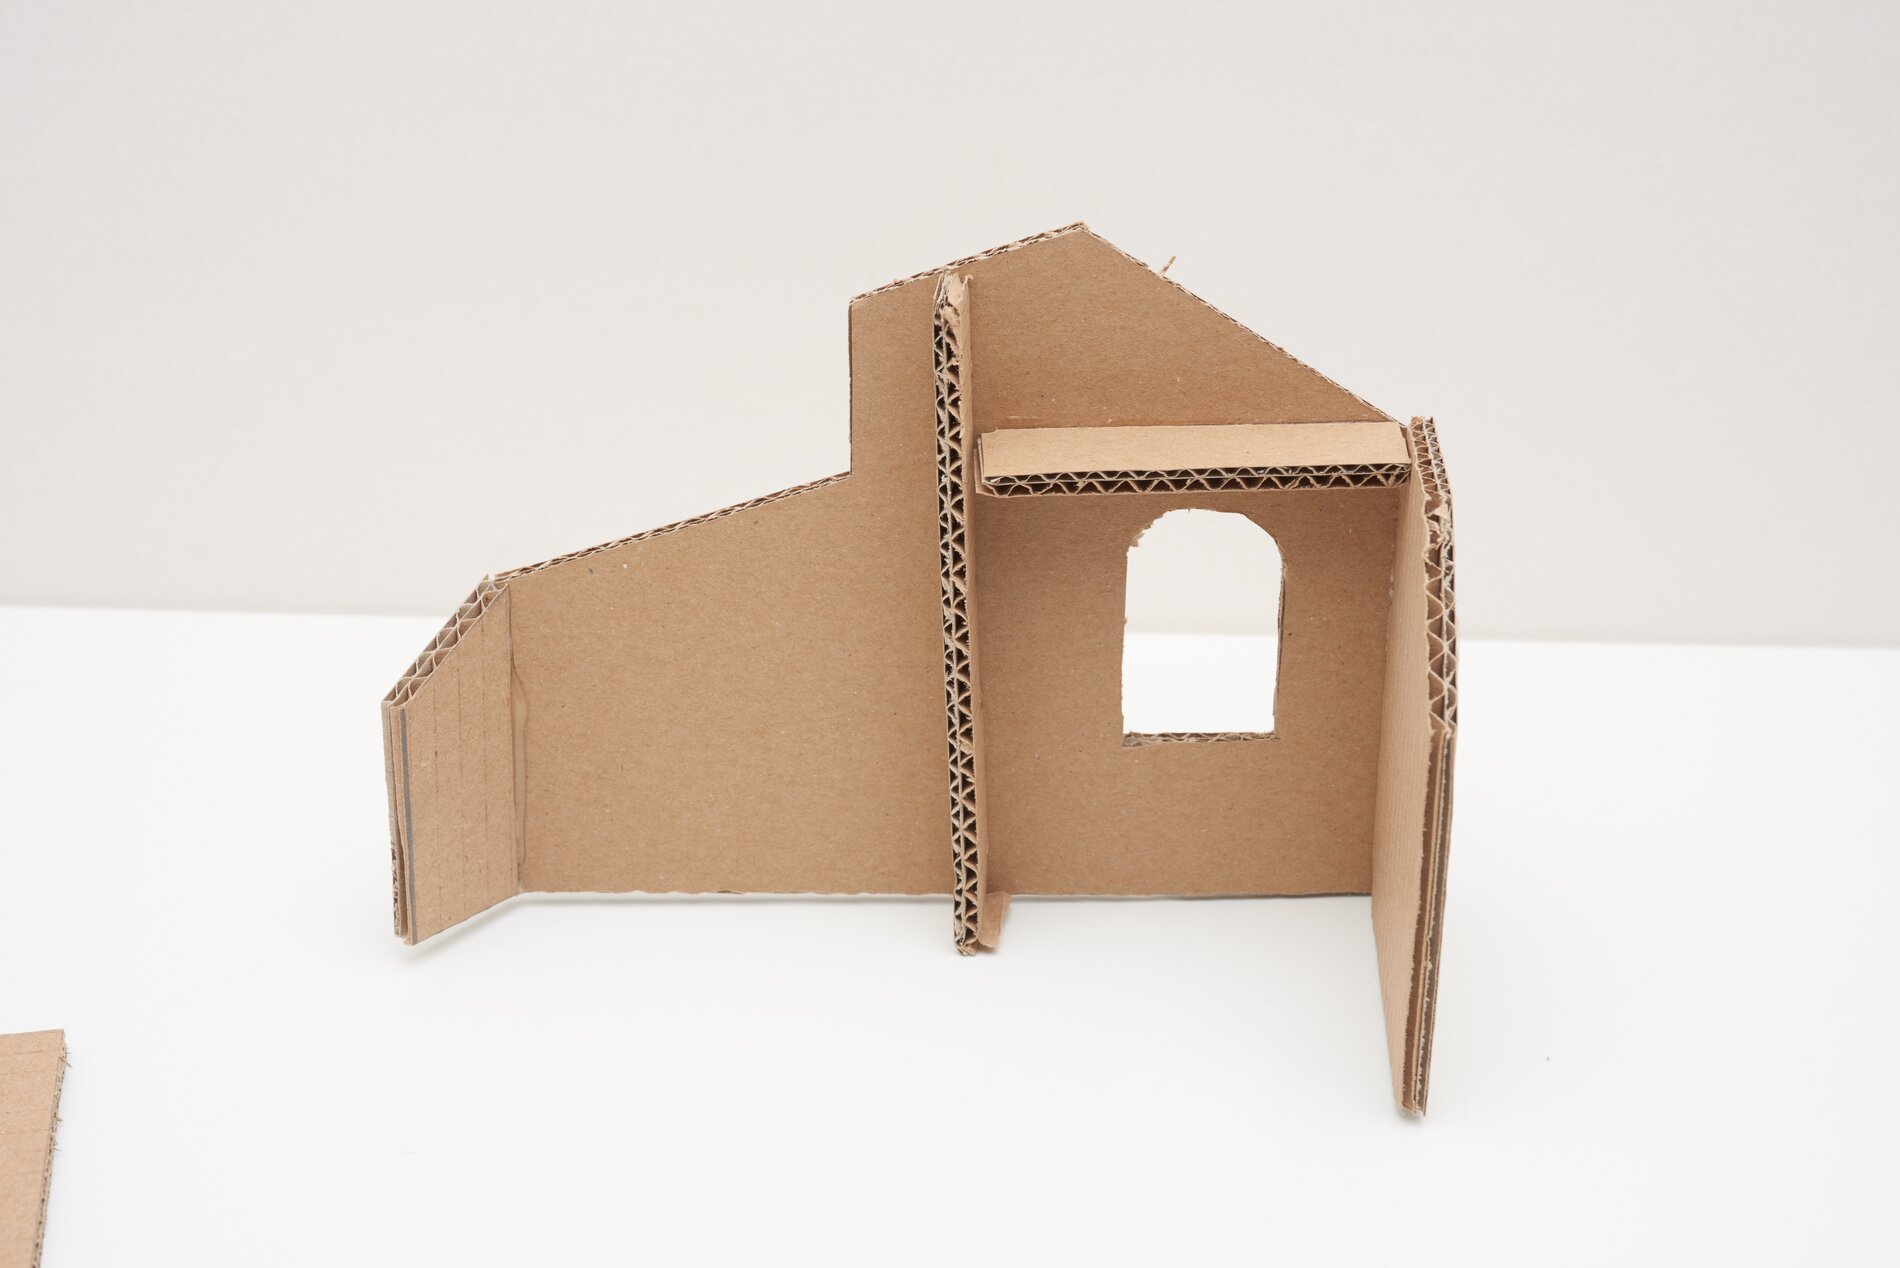
Now start to glue the components together. Hot glue is best for this. Proceed as follows: Glue the wall bevel A to the marked spot on the back wall so that the bevel points to the front and is on top.
Attach the window braces to the rear wall. The points are marked with dotted lines.
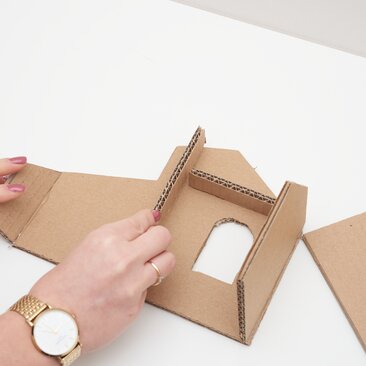
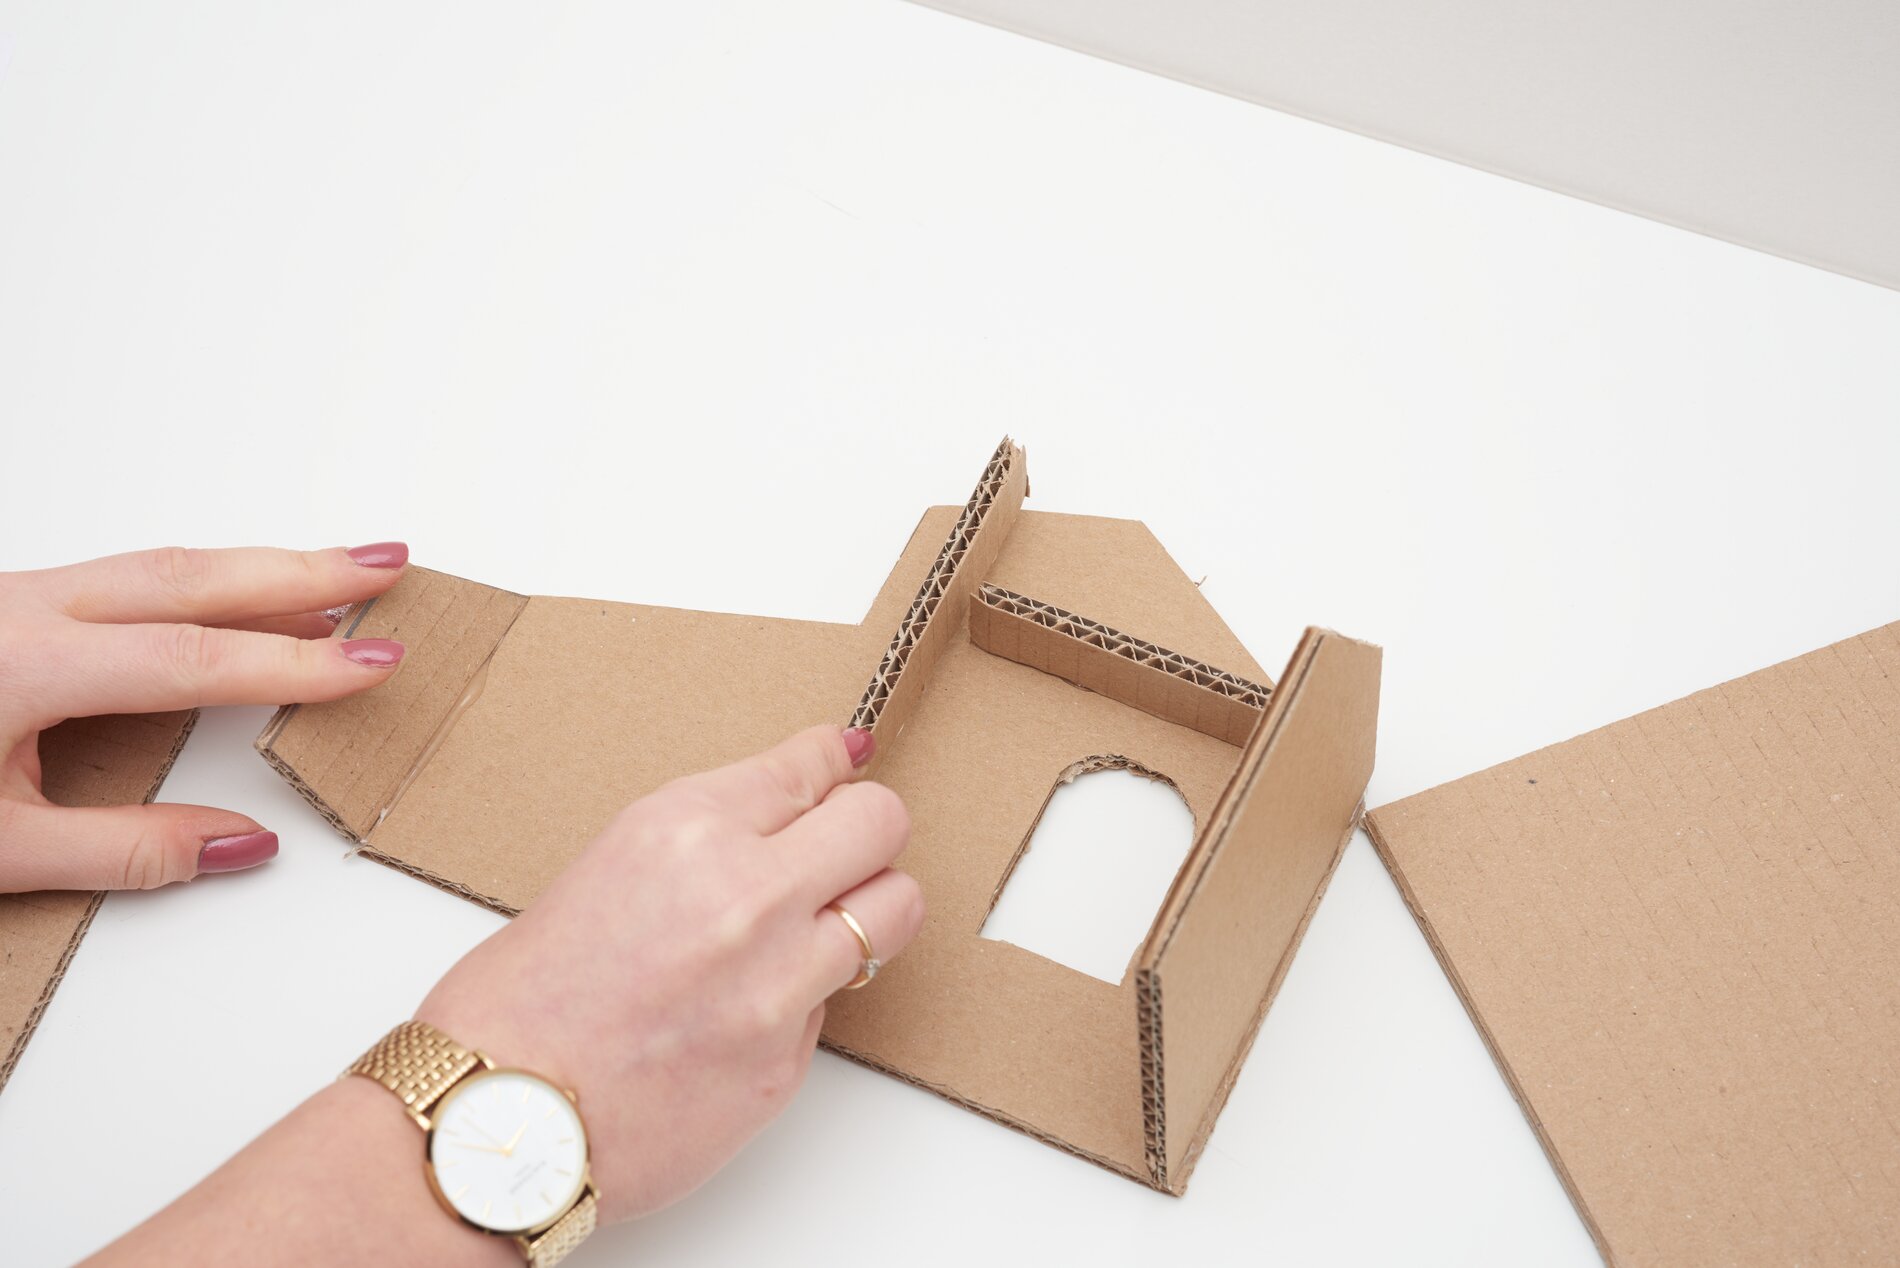
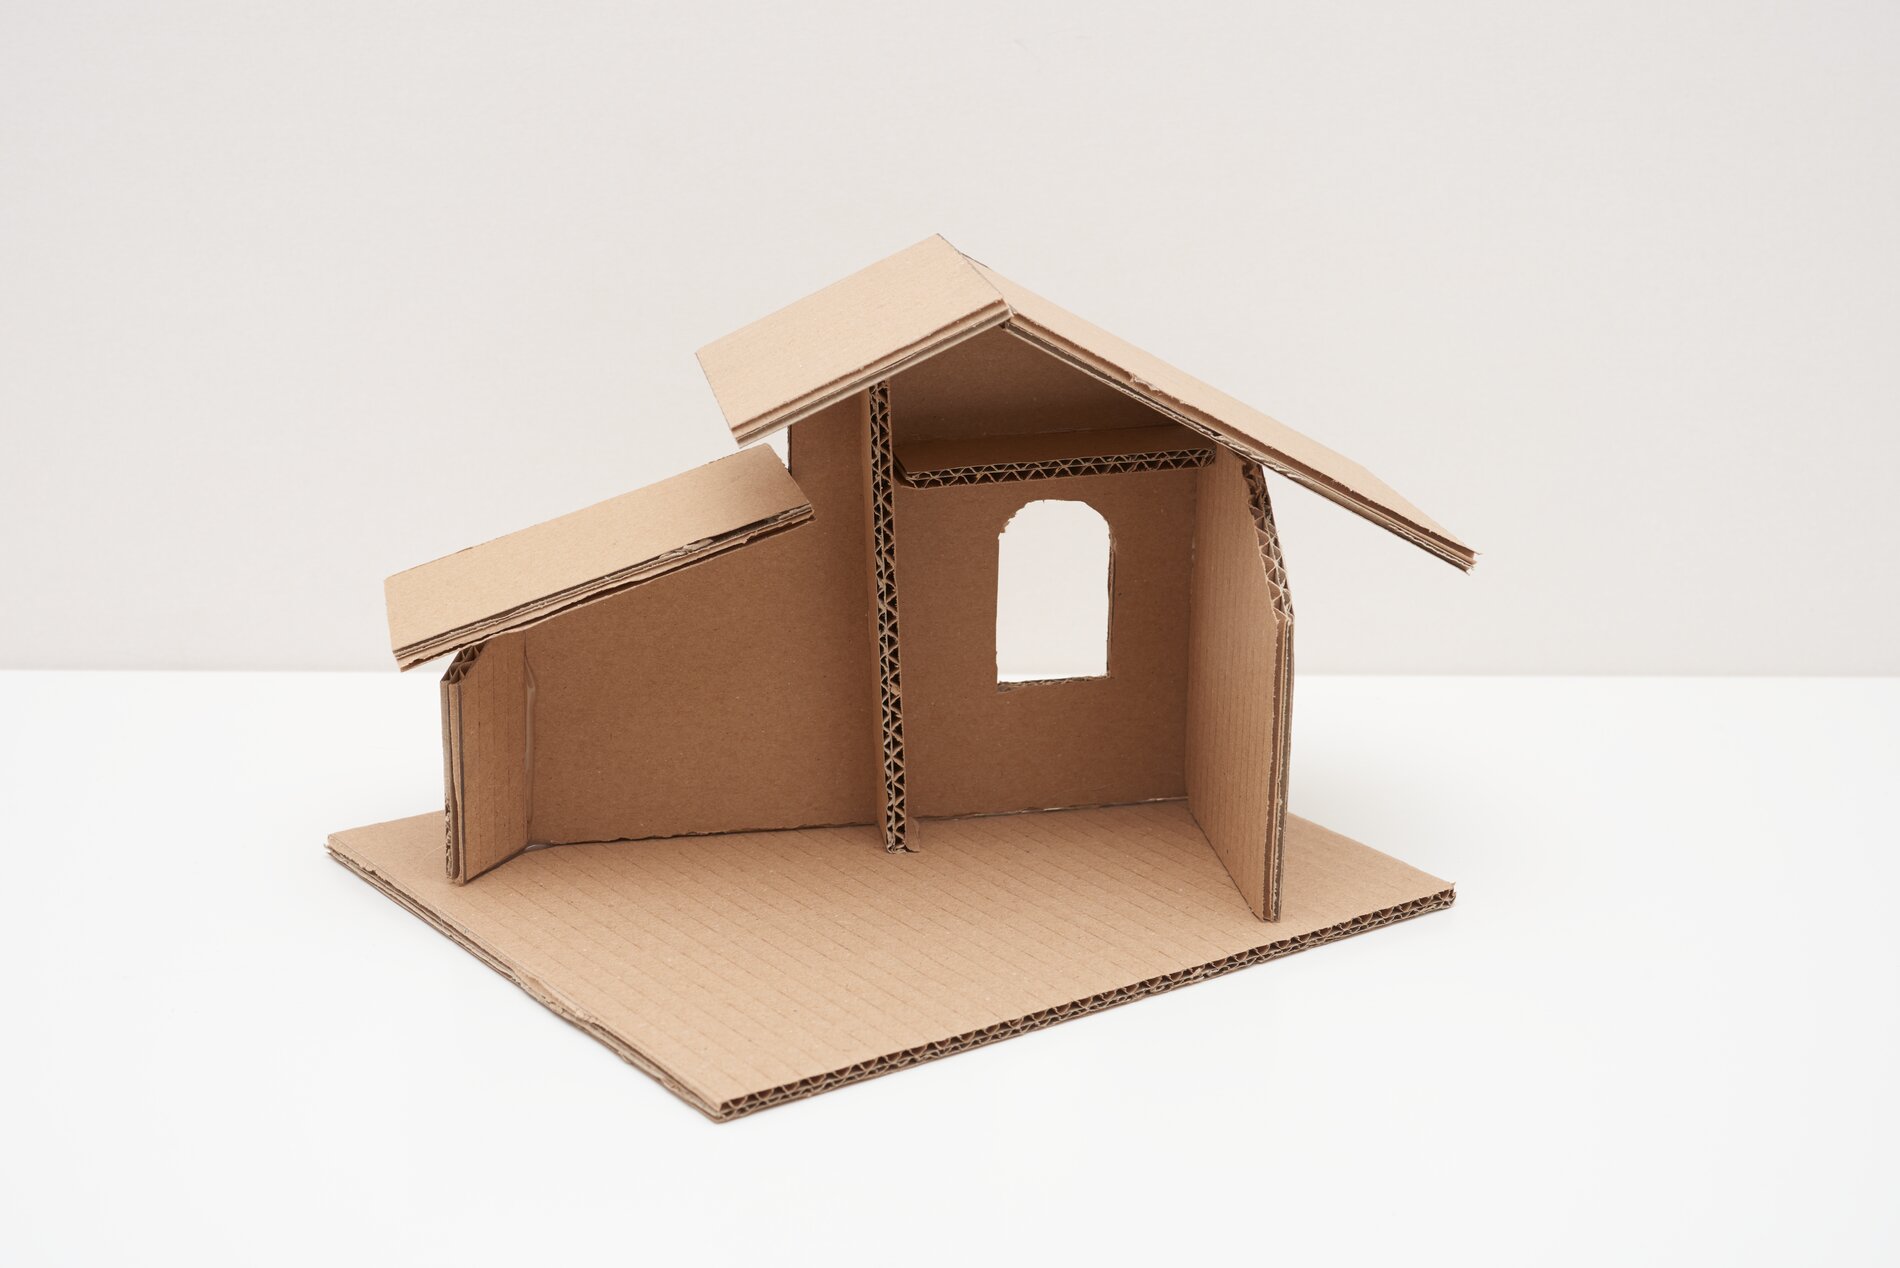
Next, attach the wall slope B to the specified position on the back wall. Please make sure that the slope runs downwards so that the roof can be put on properly later. Lay the base plate in front of you and glue the finished crib diagonally (from corner to corner).
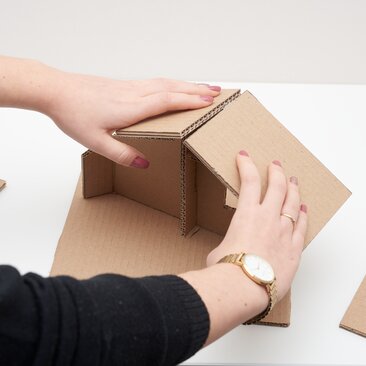
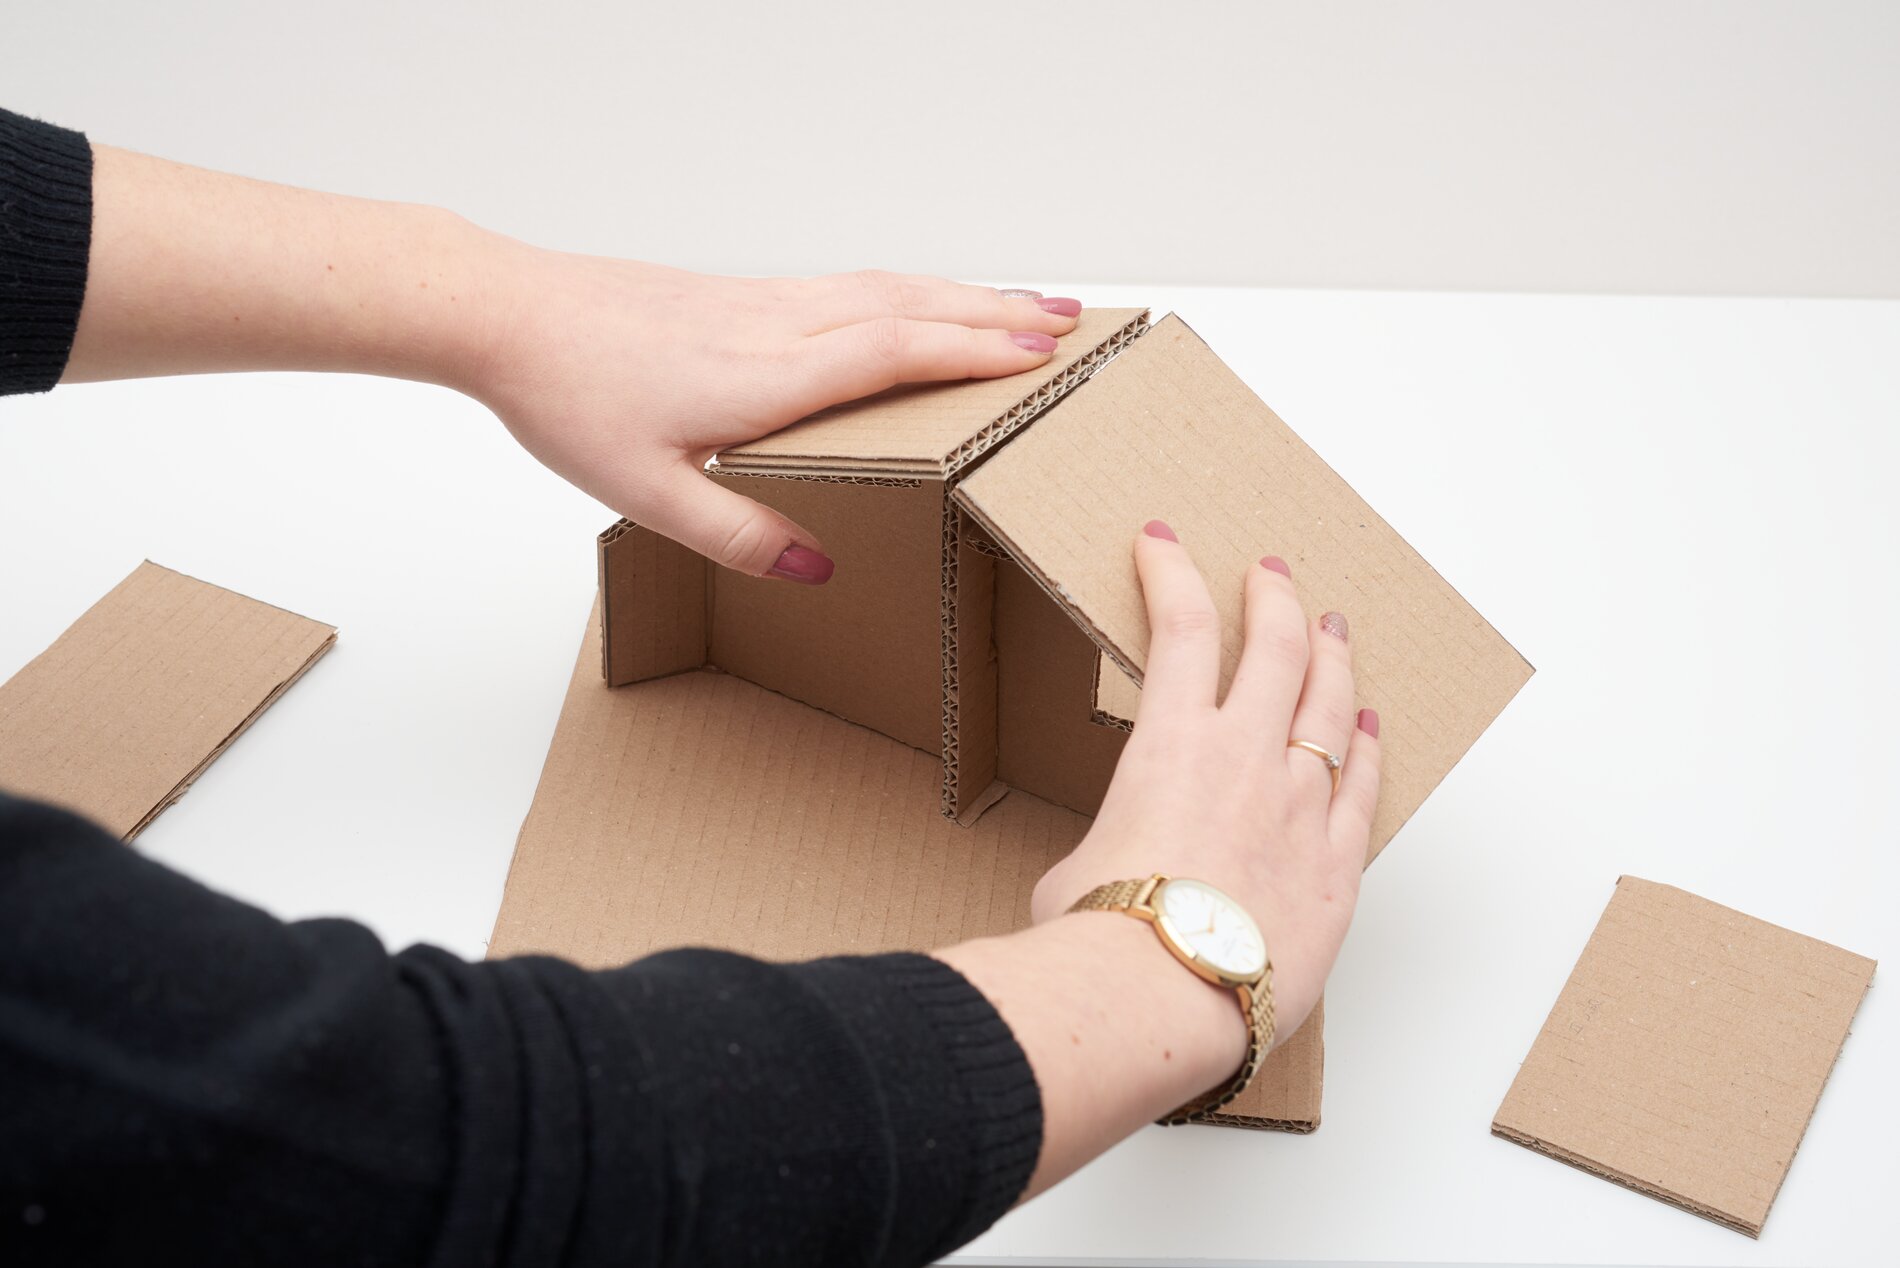
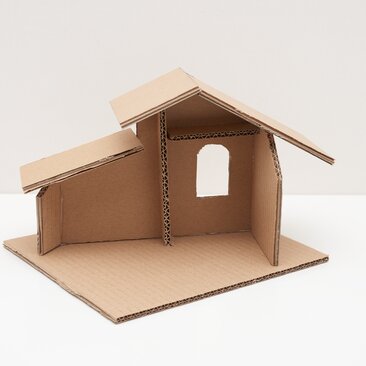
Now glue roof III to the back wall and wall A, roof I to wall B and the back wall and roof II forms a pointed roof with roof III.
TIP: If you want to change the crib individually, you can simply cut and modify the components accordingly.
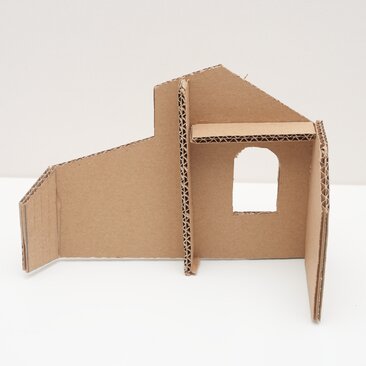
Your basic framework of the crib is now completed and you can start with the decoration and embellishment.
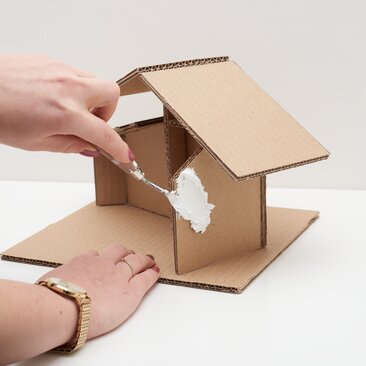
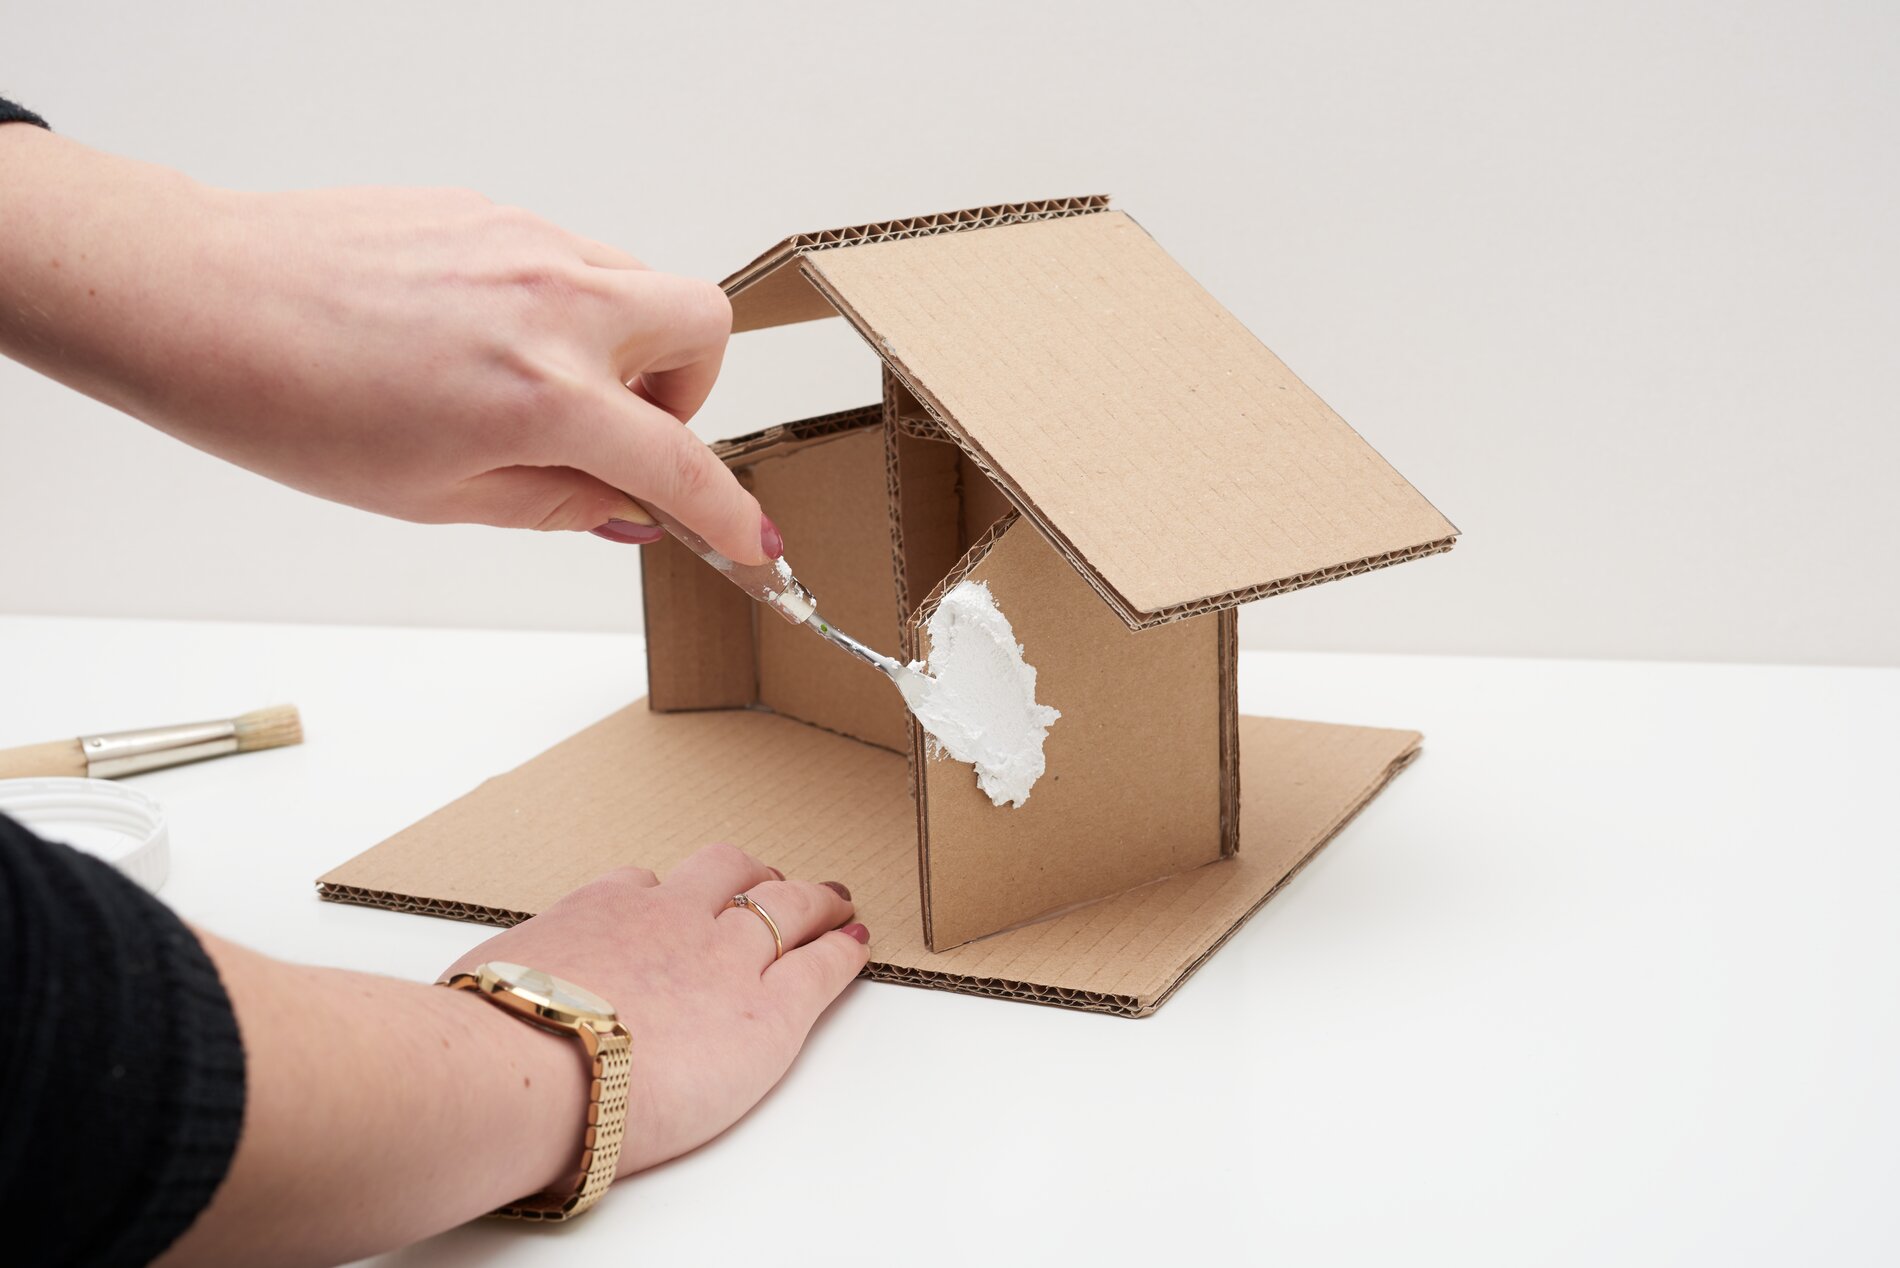
With the help of a spatula or a brush you paint the walls of the crib with Structure Paste. Let everything dry out well. Then you can remove the inner beams with Handicraft paint colored paint .
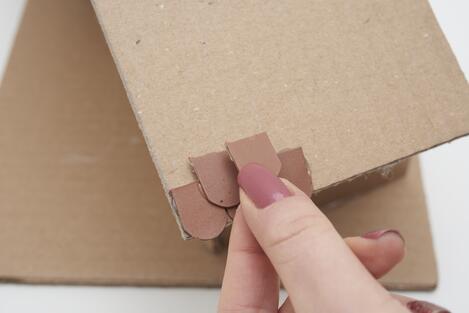
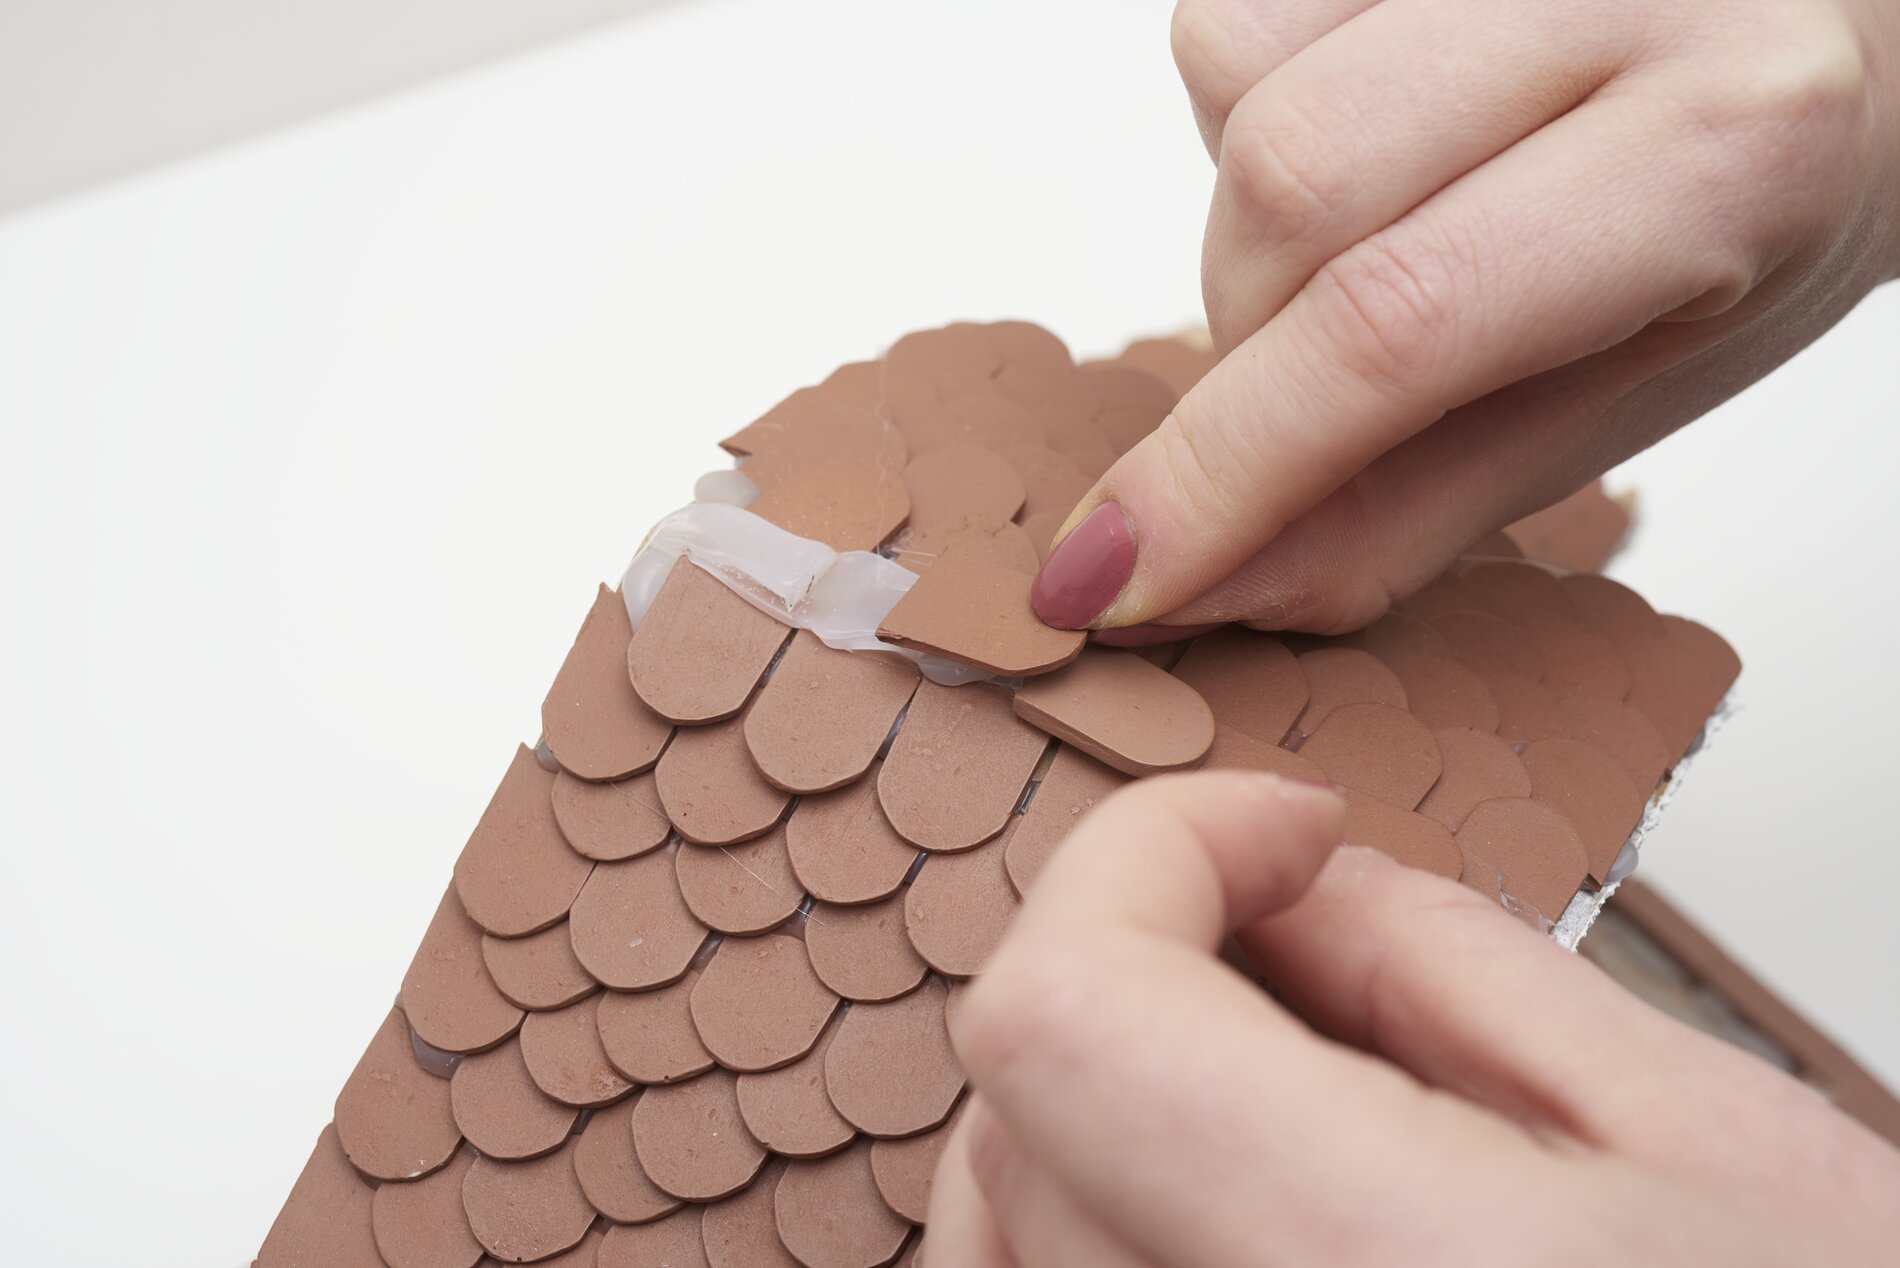
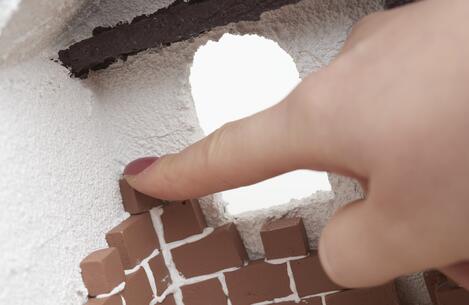
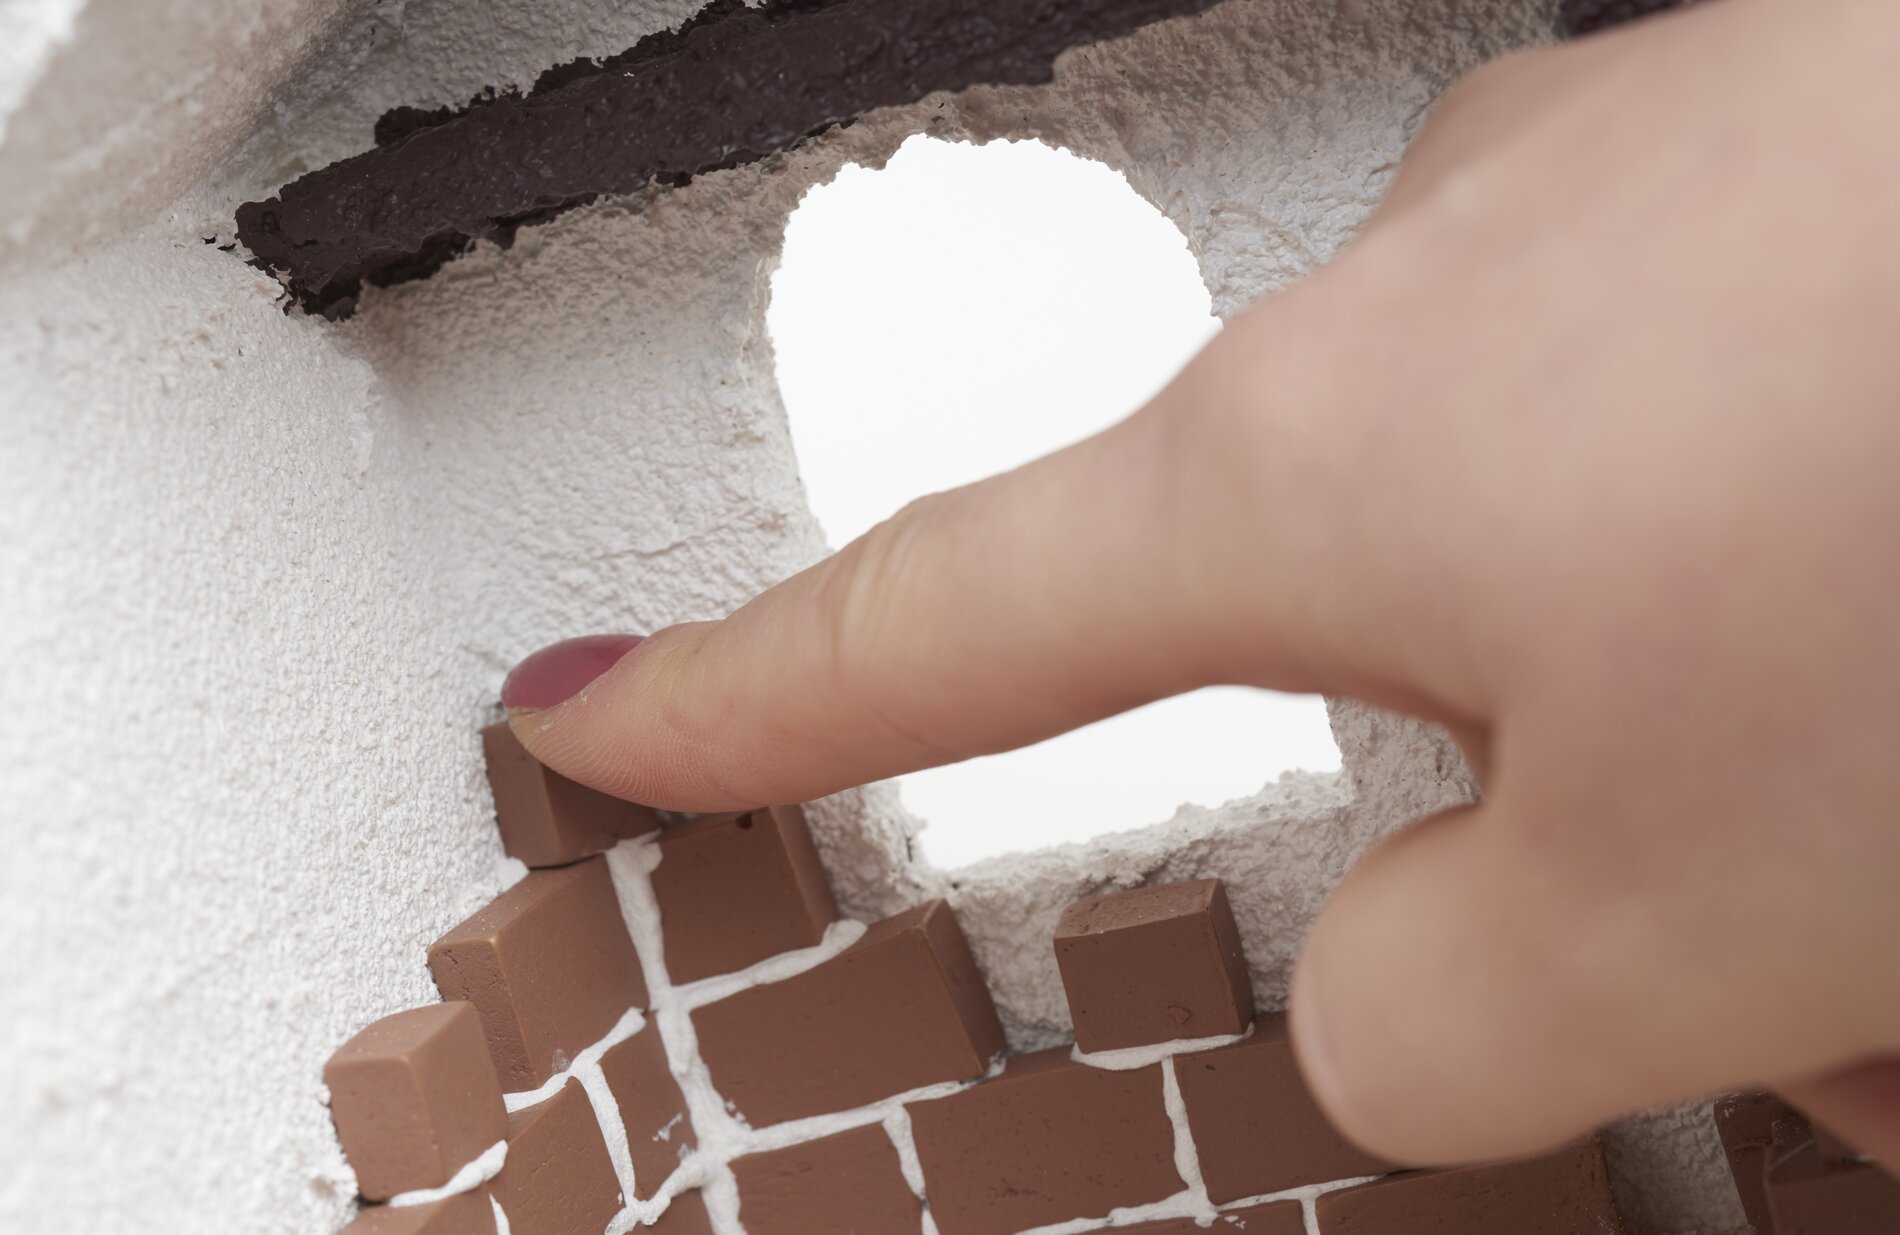
In the next step, the roof tiles are attached using hot glue and the wall tiles are also attached Structure Paste .