Individual memo boards
Instructions No. 1813With these handy memo boards, you'll never miss an appointment or birthday again and you'll remember all the items on your weekly to-do list. The boards can be personalised in a variety of ways.
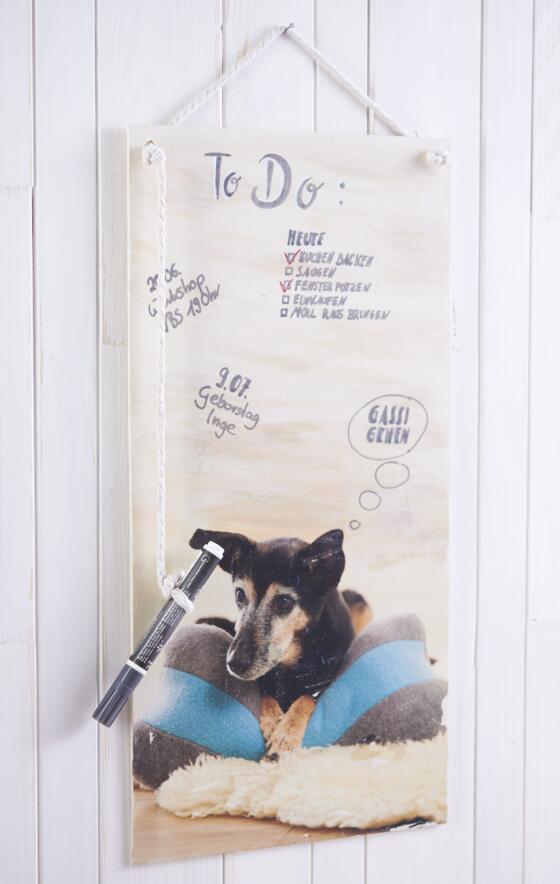
Plywood panel with transparent panel varnish
First prime the plywood panel with antique white Handicraft paint. Painting sponges are ideal for applying paint over large areas and without stripes on a substrate. Let the paint dry well. Now print out your desired picture Important: Your photo must be printed with a laser printer. Make sure that you print your picture mirror-inverted. If necessary, cut the picture slightly
Now coat your picture with the transferVBS medium and press it onto the wood with the coated side. Brush firmly over it several times. After drying, slowly walk over the picture with a damp sponge to Paper loosen it. Let everything dry again. Optionally, you can now adjust the wooden background with other craft colors to your picture
Now apply 3 layers of board varnish. Make sure that you apply the first layer horizontally, the next vertically and the third horizontally again. Always let the individual layers dry well. Now you can add notes, appointments or birthdays with a Chalk marker write on your memo board and later simply remove it again with a damp cloth
Finally, drill two holes in the top of the plywood board and draw a Cotton cord through it. Leave a longer piece on one side Cord to which you can attach Chalk marker one.
Shopping list in Pouring design
First cover your work area with foil or newspaper. Put some of your favourite colour in one cup at a time. To achieve a particularly beautiful effect, combine light colours with darker or strong colours. Put some of the Pouring Medium in addition. Stir the mixture and check whether it is flowable. If not, simply add a little more Pouring Medium in addition. For a beautiful cell formation add 1 to 2 drops of silicone oil to the colour mixture. Now tip all the colours one by one into a cup to layer them
Now place the picture frame with the front side on the cup and turn everything upside down so that the cup stands upside down on the frame. Wait a short moment before lifting the cup. Swing the frame slightly back and forth to completely cover the inside with paint. The paint must then dry for at least 24 hours. Paint the outer edge of the frame with VBS Handicraft paint Grey. the inner part is now coated with 3 layers of colourless blackboard varnish. Ensure that you apply the layers alternately horizontally and vertically and take into account the drying times between the individual layers. After the paint is completely dry, the board surface can be marked with chalk markers as often as desired. Old notes can be removed with a damp cloth
Attach something to the back of the frame Satin ribbon to hang up. Tack the ends firmly.