- Secure order
- Easy return shipment
- Service-Hotline +41 71 511 23 70
Instructions No. 3632
Difficulty: Advanced
Working time: 8 Hours

Step 1: Use the template
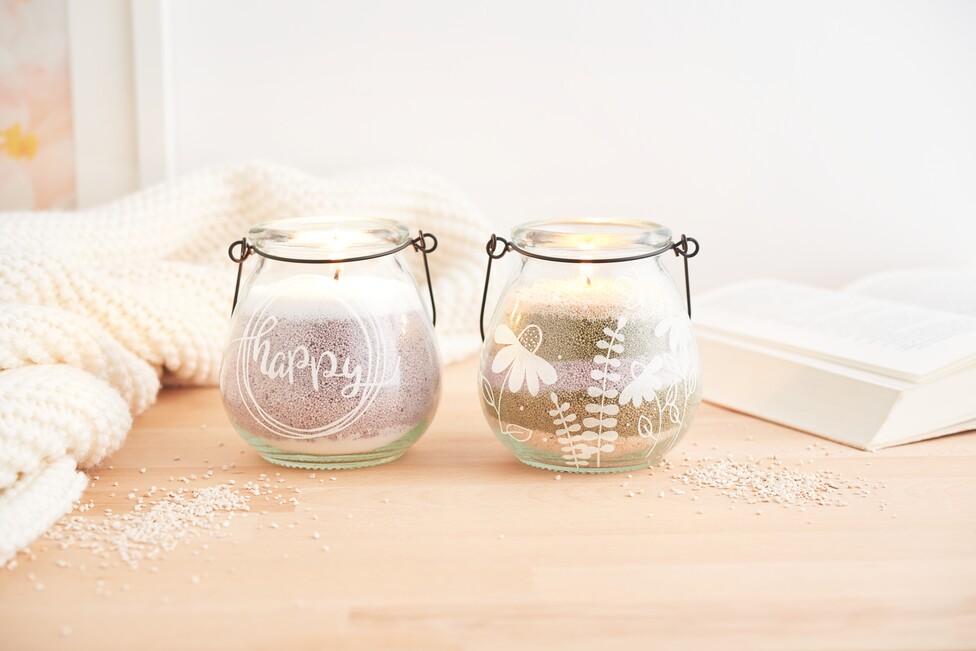
First, download our free template. Print it out and place it carefully on the inside of the wind light. This will ensure that the motif is clearly visible during the engraving process and that you can trace it easily.
Step 2: Trace the motif
Now use a foil pen to accurately transfer the motifs contained in the template onto the glass. Make sure that the lines are clearly visible so that you have a clear guide when engraving.
Step 3: Make the engraving
Now comes the fun part! Insert the diamond head into your engraving machine. Then trace the pre-drawn lines slowly and with even pressure. The diamond head is a special engraving needle that is particularly suitable for working on glass due to its hardness. Take your time and work carefully to create clean lines.
Step 4: Clean the glass
After you have finished engraving, use a soft cloth or a piece of kitchen roll to clean the engraving dust from the glass. Make sure that no residue remains that could interfere with the rest of the process.
Step 5: Fill with candle sand
Now it gets colorful! Choose candle sand in different colors and fill it into the wind light. in layers. These fascinating layers of color give your wind light a special visual depth and allow you to adapt the color scheme to your personal taste.
Step 6: Insert the wick
The final touch! Place the wicks upright in the candle sand. They should be stable and the layers of sand will hold them securely in place. If the wicks are too long, simply cut them to the desired height with scissors.
Are you ready to create your own sparkling lanterns with personalized engraving? Visit our online store now, where you'll find everything you need for this creative project - from high-quality engraving tools to colorful candle sand. Let your creativity run wild and turn every room in your home into a radiant place of well-being!