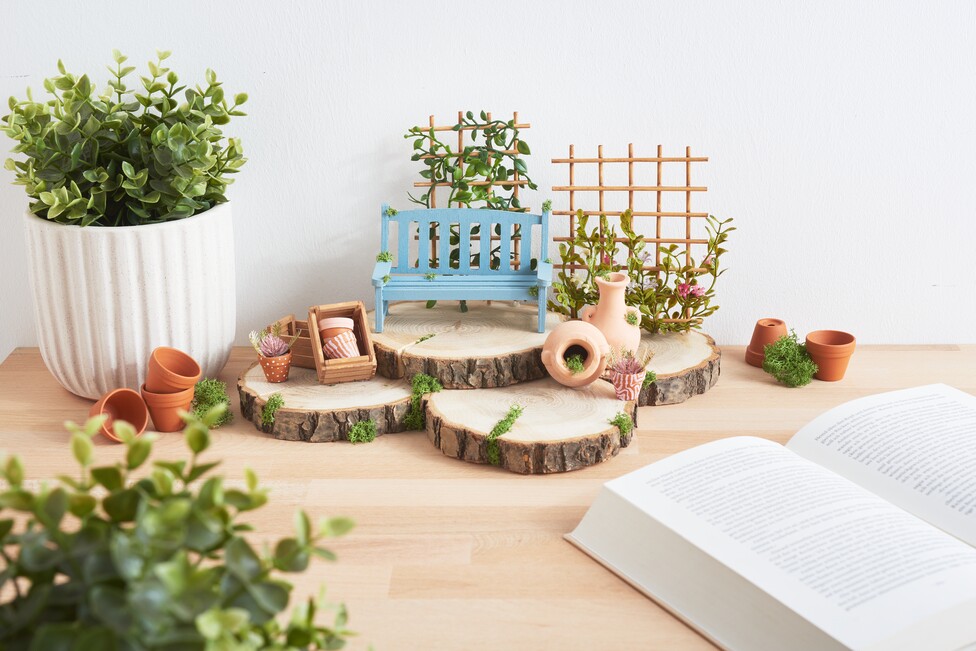
With the right instructions, you can create a beautiful miniature garden at home. This craft idea is not only perfect for adding a personal touch to your home, but also ideal as a gift or decoration. In these detailed instructions, we will show you step by step how to create a charming ambience that will make any plant lover's heart beat faster.
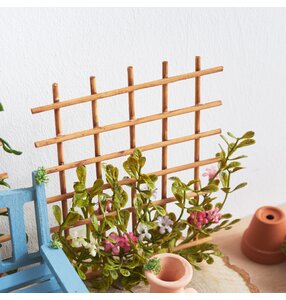
1. Making plant trellises Start by cutting the shashlik skewers for the plant grids. For the large plant grid, you will need seven skewers measuring 11 cm and five skewers measuring 14 cm. For the smaller trellis, you need seven skewers measuring 9 cm and four skewers measuring 14 cm. These dimensions are essential to create a stable and aesthetically pleasing trellis so that your plants are shown off to their best advantage later on.
2. Gluing skewers to the trellis Glue the cut skewers together to form a grid using hot glue. Make sure that there is an even distance of around 1 cm between the skewers. This distance ensures an even structure of the plant lattice and provides sufficient space for the decorative elements.
3. Color scheme of the plant trellis and fruit trellis To give the miniature garden a natural look, mix some brown paint with water. Paint the plant trellis and miniature wooden fruit steps with this mixture and leave to dry completely. The diluted paint ensures that the wood structure remains visible and gives the parts an authentic and natural look.
4. Decoration with leaves and flowers Once dry, you can prepare the mini leaf garland and flower picks. Cut these into suitable sizes and insert them decoratively into the plant grids. Attach them with hot glue as well to ensure that everything stays firmly in place.
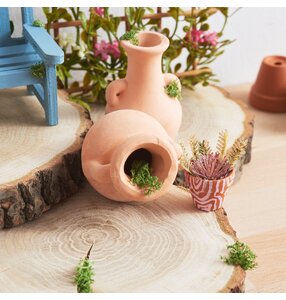
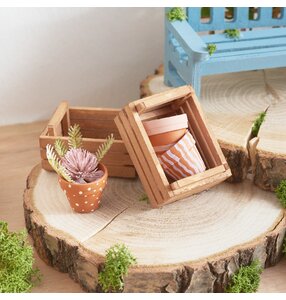
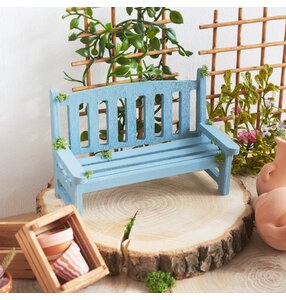
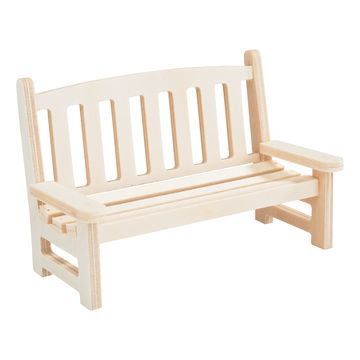
5. Painting miniatures and designing the inflorescence Now it's time to paint the miniature "Lars" bench and the mini-terracotta-pots to your liking. Allow these elements to dry completely before continuing. Then cut off parts of the inflorescence branch and arrange them in the mini-terracotta-pots. Secure everything with hot glue for a stable hold.
6 Finishing the miniature garden The VBS "Round" tree slices are now joined together with hot glue. As soon as the glue has dried, they form a stable base for the other decorative elements: place the decorative elements you have made, such as the garden bench, terracotta pots and flower trellis, on the tree discs according to your personal ideas and also fix everything in place with hot glue. To complete the overall picture, you can attach moss in various places at the end.
Look forward to your own miniature garden: You can find all the materials for your craft project in our online store. Order now and get crafting!
Look forward to your own miniature garden: You'll find all the materials you need for your craft project in our online store. Order now and get crafting!