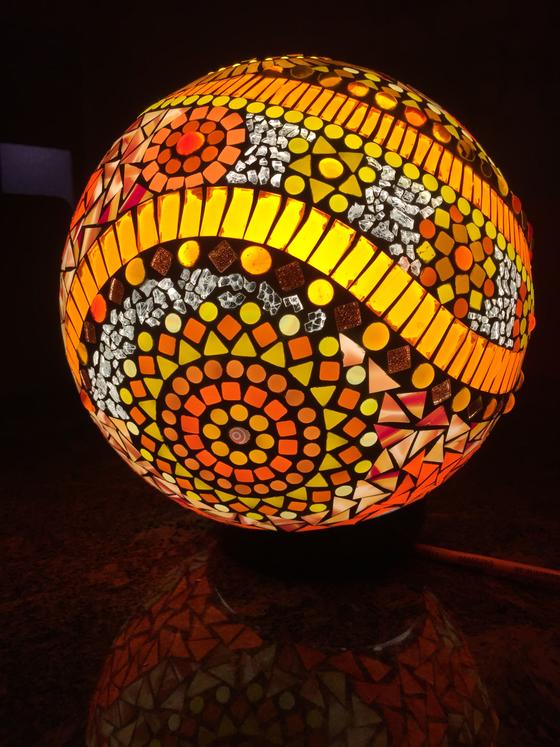
Our winner Marion72 made the big garden lamp with dark Joint Filler and Tiffany glass
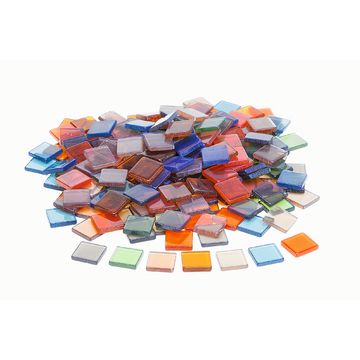
We recommend you to use cheaper
Acrylic mosaic from our assortment for the rebuilding. This can even be cut into shape and is available in different colour assortments
The lamp is a large
Acrylic ball in 20 to 29 cm Ø size. With a pair of pliers the suspension eye of the ball is broken off and with hot glue a hole is made for the cable of
Fairy lights burnt in.
First, place the different mosaic patterns from the little stones in front of you on the table. Once you are satisfied with the arrangement, glue the tiles with
transparent mosaic glue one by one in the pattern you have created on Acrylic ball.
In this way, cover the entire Acrylic ball with the colored mosaic tiles. Before gluing them together, place your light chain or lamp already in the ball and make sure that the hole for the cable of the light chain remains free when designing.