- Secure order
- Easy return shipment
- Service-Hotline +41 71 511 23 70
Instructions No. 3366
Difficulty: Beginner
Working time: 2 Hours
Unicorns made from polymer clay: creative projects for young and old
From us to you: Unicorns fascinate people of all ages with their grace and magic. With our detailed instructions, you can make your own creative 3D and 2D unicorns out of polymer clay and let your imagination run wild. Whether as pendants, decorations for caskets or book covers, these little works of art are real eye-catchers and perfect gift ideas. In these step-by-step instructions, you will learn how to create polymer clay unicorns with minimal materials. Let's get started right away!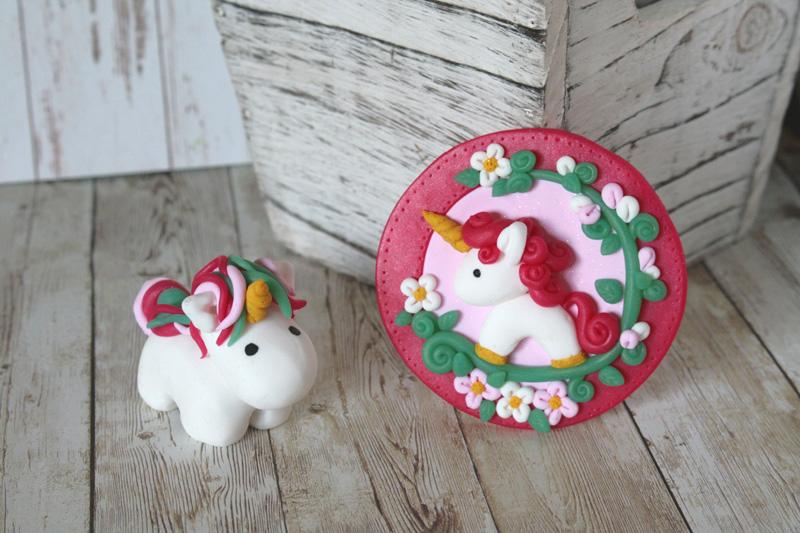
Unicorns made from polymer clay - what you should know beforehand
Before you start, make sure that the polymer clay is well kneaded in your desired colors so that the individual components can be easily shaped later. If your unicorn will later be used as a pendant, it is advisable to pre-drill a hole with a toothpick before putting it in the oven. The basics are now clear? Great, then you can get started with the first steps.

Step 1: Create your 3D unicorn
Start with the basic body of your 3D unicorn. Take a larger piece of white polymer clay and use it to shape the unicorn's torso. Press the polymer clay over your little finger until a kind of bridge is formed and divide this area with the knife to create the legs later. Once the torso is in place, shape the head and add it by pressing it into a suitable place.

Continue then it's on to the details. Shape a small ball into a triangle for each ear and press it carefully onto the head. For the unicorn's characteristic horn, twist two strands of gold polymer clay together to form a pointed horn and then cut it to the desired length before attaching it to the head. The mane is made from further strands that you attach between the horn and the ears.

Finally, it's the tail's turn. You will need three strands of the same length and thickness, which you twist into one thick strand. Thin out the ends slightly and attach the tail to the back of the unicorn.

Bake your unicorn at 110°C top and bottom heat for around 20 minutes. After cooling, use a black marker to give it cute eyes.
Step 2: Create a charming 2D unicorn
Start by rolling out the light and dark pink FIMO flat: First cut out a large circle from the dark pink and remove a smaller circle from inside it so that you have a ring of polymer clay. Cut out a light pink piece as a smaller circle and place this as a filling inside the dark ring. Smooth both areas of polymer clay together with your fingers so that any gaps disappear.

Make the unicorn's head and body and place both on the lower third of the modeled circle. For the mane and tail, use the dark pink to form small, thin strands, the ends of which you FIMO Thin out the ends and then roll them up on one side. Shape the ears and horn as described in these instructions for the 3D unicorn and attach them to the unicorn. You can then adjust the mane around the ear if necessary. You can easily indicate the eye with a toothpick.

Create the tendril decoration: Shape tendril elements from polymer clay and fit them around the unicorn by sliding them under the large tendril.

Gradually add details such as petals and leaves. This will hide the transitions between the colors and bring your unicorn to life. Use some more gold polymer clay for the hooves and flower stamps.
Place this unicorn in the oven for approx. 20 minutes at 110°C top and bottom heat. If you like, you can paint on the eye with a black marker once it has cooled.
Complete your unicorns
Be inspired by the magic of unicorns and enjoy your artistic creations! Discover a large Selection range of polymer clay, accessories and other craft products in our online store. Have fun creating lots of happy unicorns!