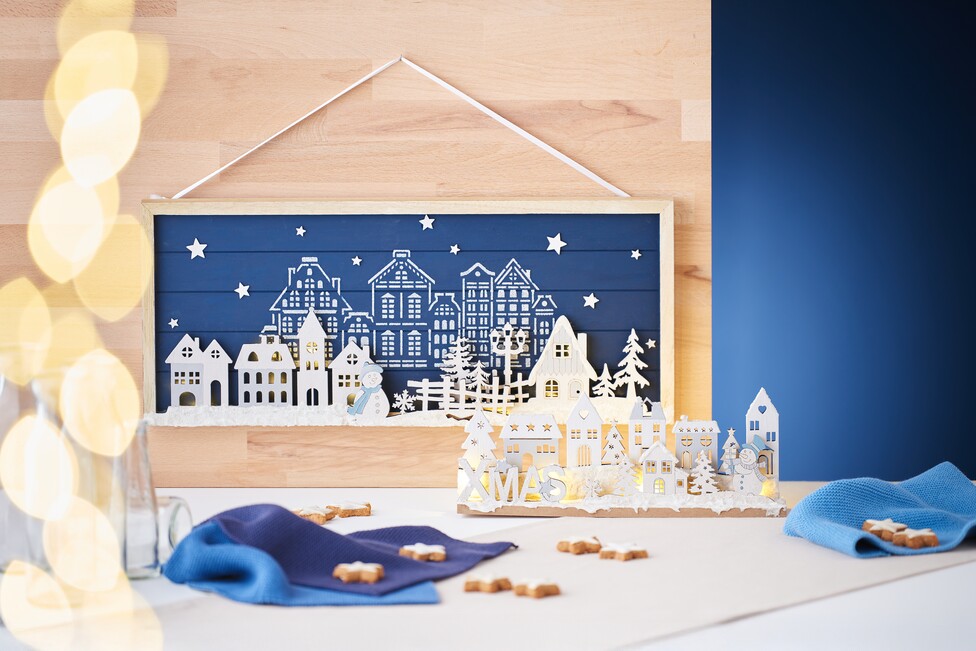
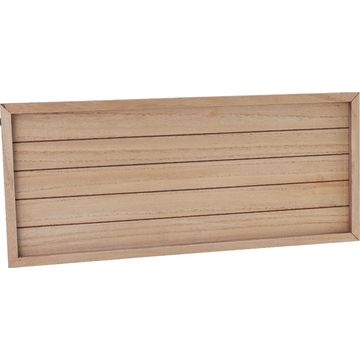
Preparing the plank shield
Priming the shield: Start by painting your plank shield. To do this, use navy blue handicraft paint and apply it evenly. Allow the paint to dry completely to avoid smudging later.
stenciling with decorative snow glitter: Spray one side of the stencil with spray adhesive and press it gently onto the sign. Make sure that the stencil lies flat to avoid blurred edges. Now use a palette knife to coat the stencil with decorative snow glitter. Remove the stencil while the snow is still wet and clean both the stencil and the spatula thoroughly under running water.
Designing the wooden plug-in motifs
Painting the plug-in motifs: Select the wooden plug-in motifs and paint them with an off-white handicraft paint. Some scatter decoration also receive this coat of paint. Wait until everything is completely dry.
Adding accents: Use the color palette from the VBS Blue nature" craft paint set to add further color accents. If something has been painted over, you can trace the lines with a fineliners after drying.
Embellishment with snow: Apply decorative snow glitter to the pegboard motifs. You can use a spatula or a thin brush for this. Allow the snow to dry well.
Combination of frame and pegboard
Prepare the pegboard: Choose one building kit for the plank sign and one for the pegboard. Stick about 5 mm of crepe-adhesive tape. to the bottom end of the motif strip so that the pegboard can be used smoothly later. Then cover the motif with decorative snow and remove the adhesive tape before the snow dries.
Attaching the led-lighting: Attach a 10 micro LED chain of light to the back of the plug-in motifs. Use hot glue for this. The battery compartment is also fixed to the back. Insert the motif strip into the plug-in strip and complete the look with more decorative snow.
Designing the plank sign with spacers: To attach the plug-in motifs at some distance from the plank sign, cut a few wooden sticks and glue them to the back of the plug-in motifs using hot glue. Attach another 10 LED micro chain of light to the back and attach the building kit in or to the frame of the sign. Carefully attach the battery compartment to the back.
Final decoration and hanging: Decorate the sign as desired with sprinkles and attach decorative snow to the bottom edge of the sign. To hang up your work of art, attach a sturdy ribbon to the eyelets on the sign.
Now it's time to let your creativity run wild and create your own wintry works of art. Visit our online store to purchase all the materials you need for this wonderful project DIY-Project. Give your room a cozy winter glow with your unique creation!