www.vbs-hobby.com
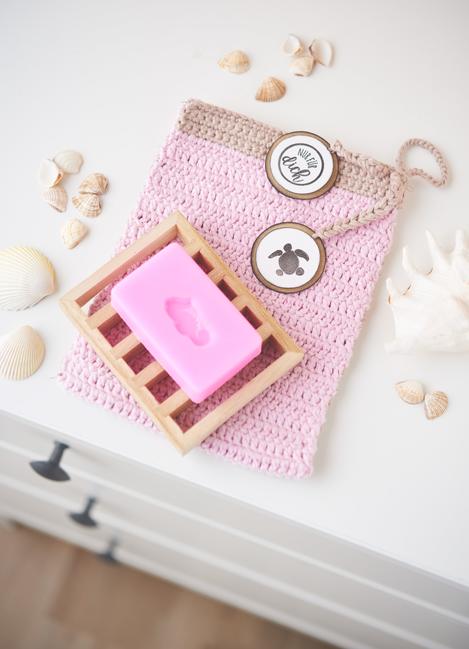
Gehäkelter Waschhandschuh mit DIY Seife
Instructions No. 2031 Instructions No. 2031 Difficulty: Beginner
This washing glove can be crocheted quickly by yourself. Together with a DIY soap it is a very personal and environmentally friendly gift idea.
How to crochet the washing glove
This crocheting idea is done with robust Pot cloth yarn and a crochet hook in strength 3.0 manufactured
They start with a starting loop: Here the end of the thread is doubled, formed into a small "pretzel", the needle is passed through it, with the help of the needle the loop is pulled through and Yarn then tightened
Crochet one of Chain 30 air stitches: by first pricking the needle in the starting loop and pulling it through the loop as a loop Yarn (first air stitch). The other air stitches are created by stitching through the last air stitch produced
The washing glove is now crocheted with 6 rows of fixed stitches. These are created as follows: Insert needle into the stitch, form a loop and pull through the existing exit loop. Crochet two loops on the needle with another loop (the loop and pull through the two on the crochet hook), for the next fixed stitch do the same, stitch into the next stitch. At the end of each row crochet a turning loop (= one air stitch)
In the next section crochet 19 rows of single crochet sticks. To make these sticks, work in a similar way to the fixed stitches, but with 3 loops on the needle, through which a loop is pulled. Finish each row of crochet with a turning loop
The last rows of the sticks can be crocheted here completely after personal taste with a new wool colour. Finally, pull the yarn thread through the last loop. All threads are interwoven with one in Darning needle the crochet work (clogged).
Pour soap
To pour a soap, you will need eco-casting soap. This is heated in a melting pot until it is liquid. According to your personal taste you can add (2 - 3 Soap colour drops) or caring additives and fragrances
Prepare the soap casting mould, place a silicone stamp in the mould and pour the liquid soap into it
Before you put the self made soap on the soap tray, you should coat it with a protective lacquer.
Prepare the soap casting mould, place a silicone stamp in the mould and pour the liquid soap into it
Before you put the self made soap on the soap tray, you should coat it with a protective lacquer.

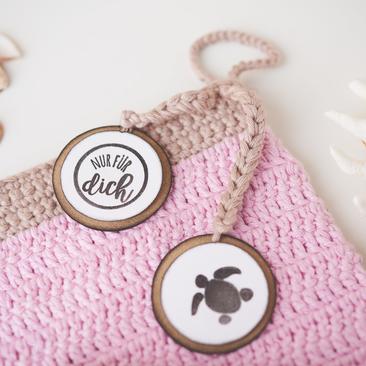
Gift tags tinker
Stamp white cardboard with your favourite message. Cut this into a label, cut a piece to fit Kraft paper it a little bit bigger, dab the edges with this and glue Ink Pads the two layers on top of each other, put a wool thread in between, with which you can crochet the label with air stitches as a pendant on the washcloth.